
DIY Pot Rack
Hello and welcome to another edition of “Can’t find what you’re looking for? Then do it yourself!” (Or at least that’s what I tell myself.)
Let me preface this with a little story. A year or so ago, my husband and I stopped at a yard sale that we happened to be driving past. I had no expectations as it wasn’t a sale that we had searched for but rather ran across it. My expectations were correct in that there wasn’t much there that caught my eye with the exception of a cardboard box full of very tarnished copper pots and pans. I threw out the usual yard sale banter, “How much for the pots?” That was followed by a very lengthy story of how the pots and pans belonged to her uncle who happened to be a pretty well known chef at some fancy restaurant. Now don’t get me wrong, I love hearing the back story of the treasures that we find. It’s what makes them so special. However, in a lot of cases, when someone starts the story out with how precious something is, that’s usually followed by a large price tag. “Would you do $5 for the box?” she asked. “Somebody slap me,” I thought to myself. “Why, yes I would!” I’m guessing the uncle wasn’t that precious to her but he was now precious to me…or at least his pots and pans were.
I brought the pots and pans home and cleaned and polished each and every one of them. I admired how beautiful they were and then placed them in the back of my cabinet as I had no where to display them.
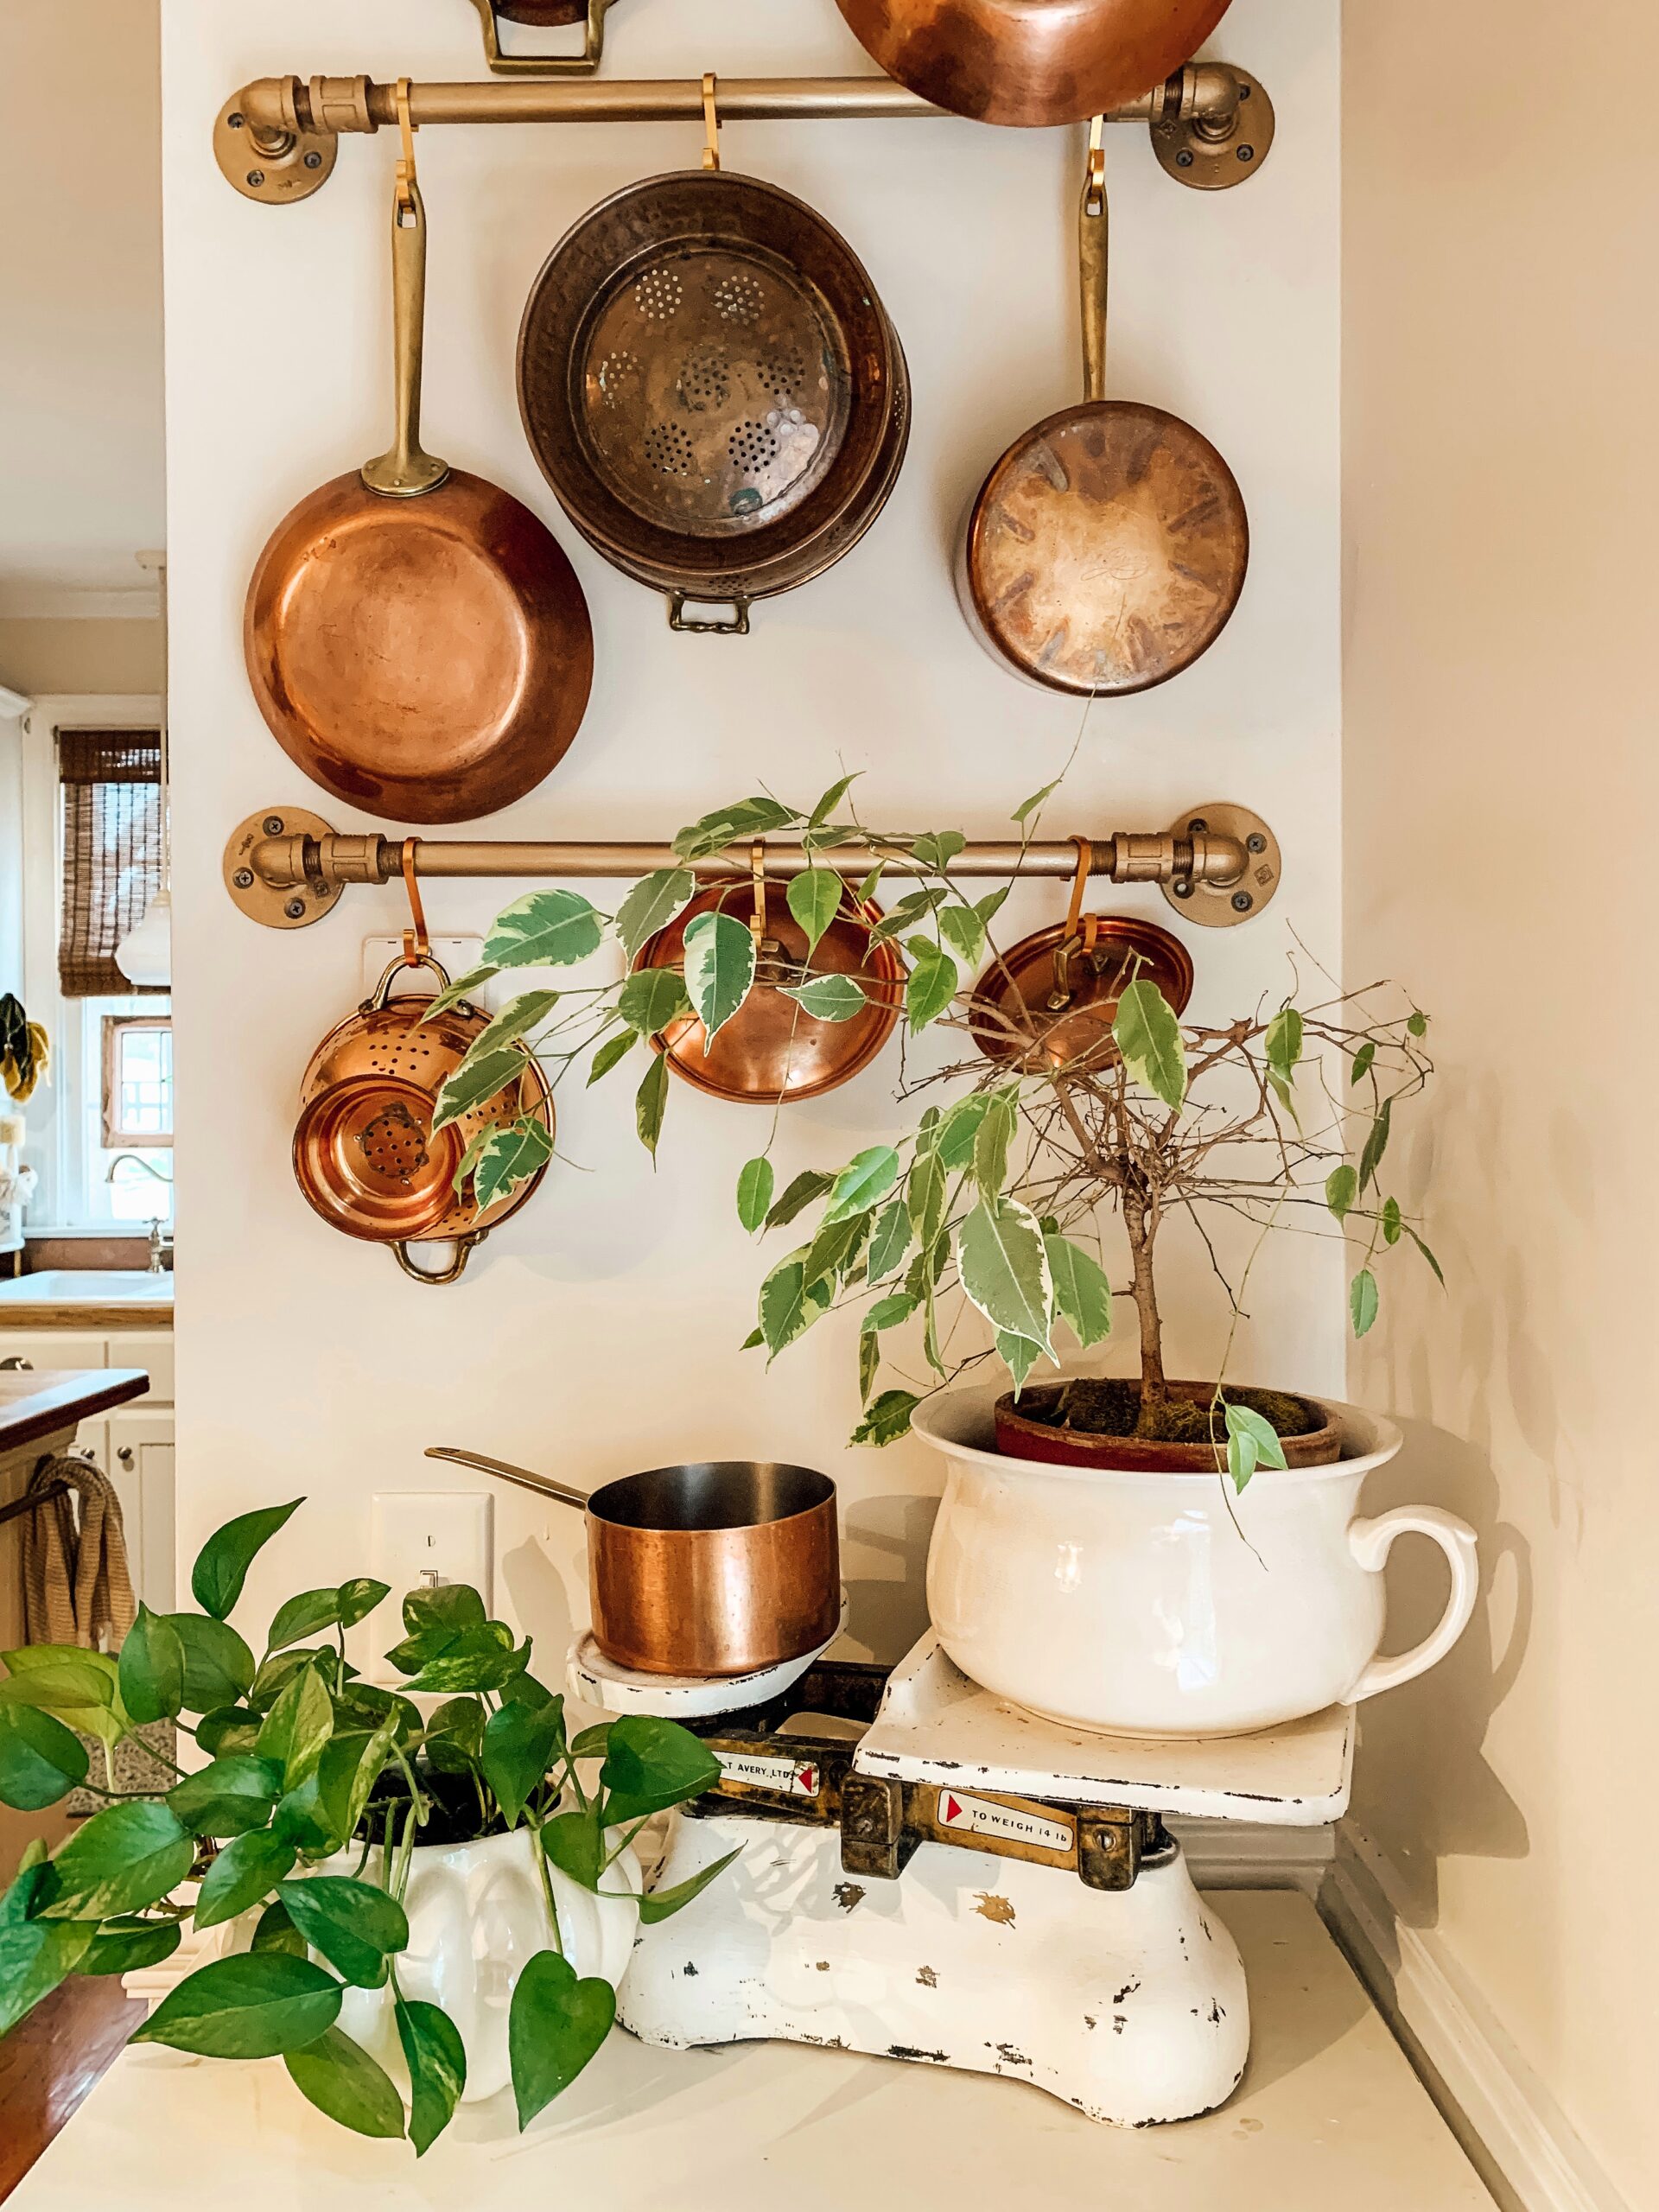
Fast forward to a year later, I had a brainstorm and I finally brought them out of hiding. I was going to build a pot rack to display them.

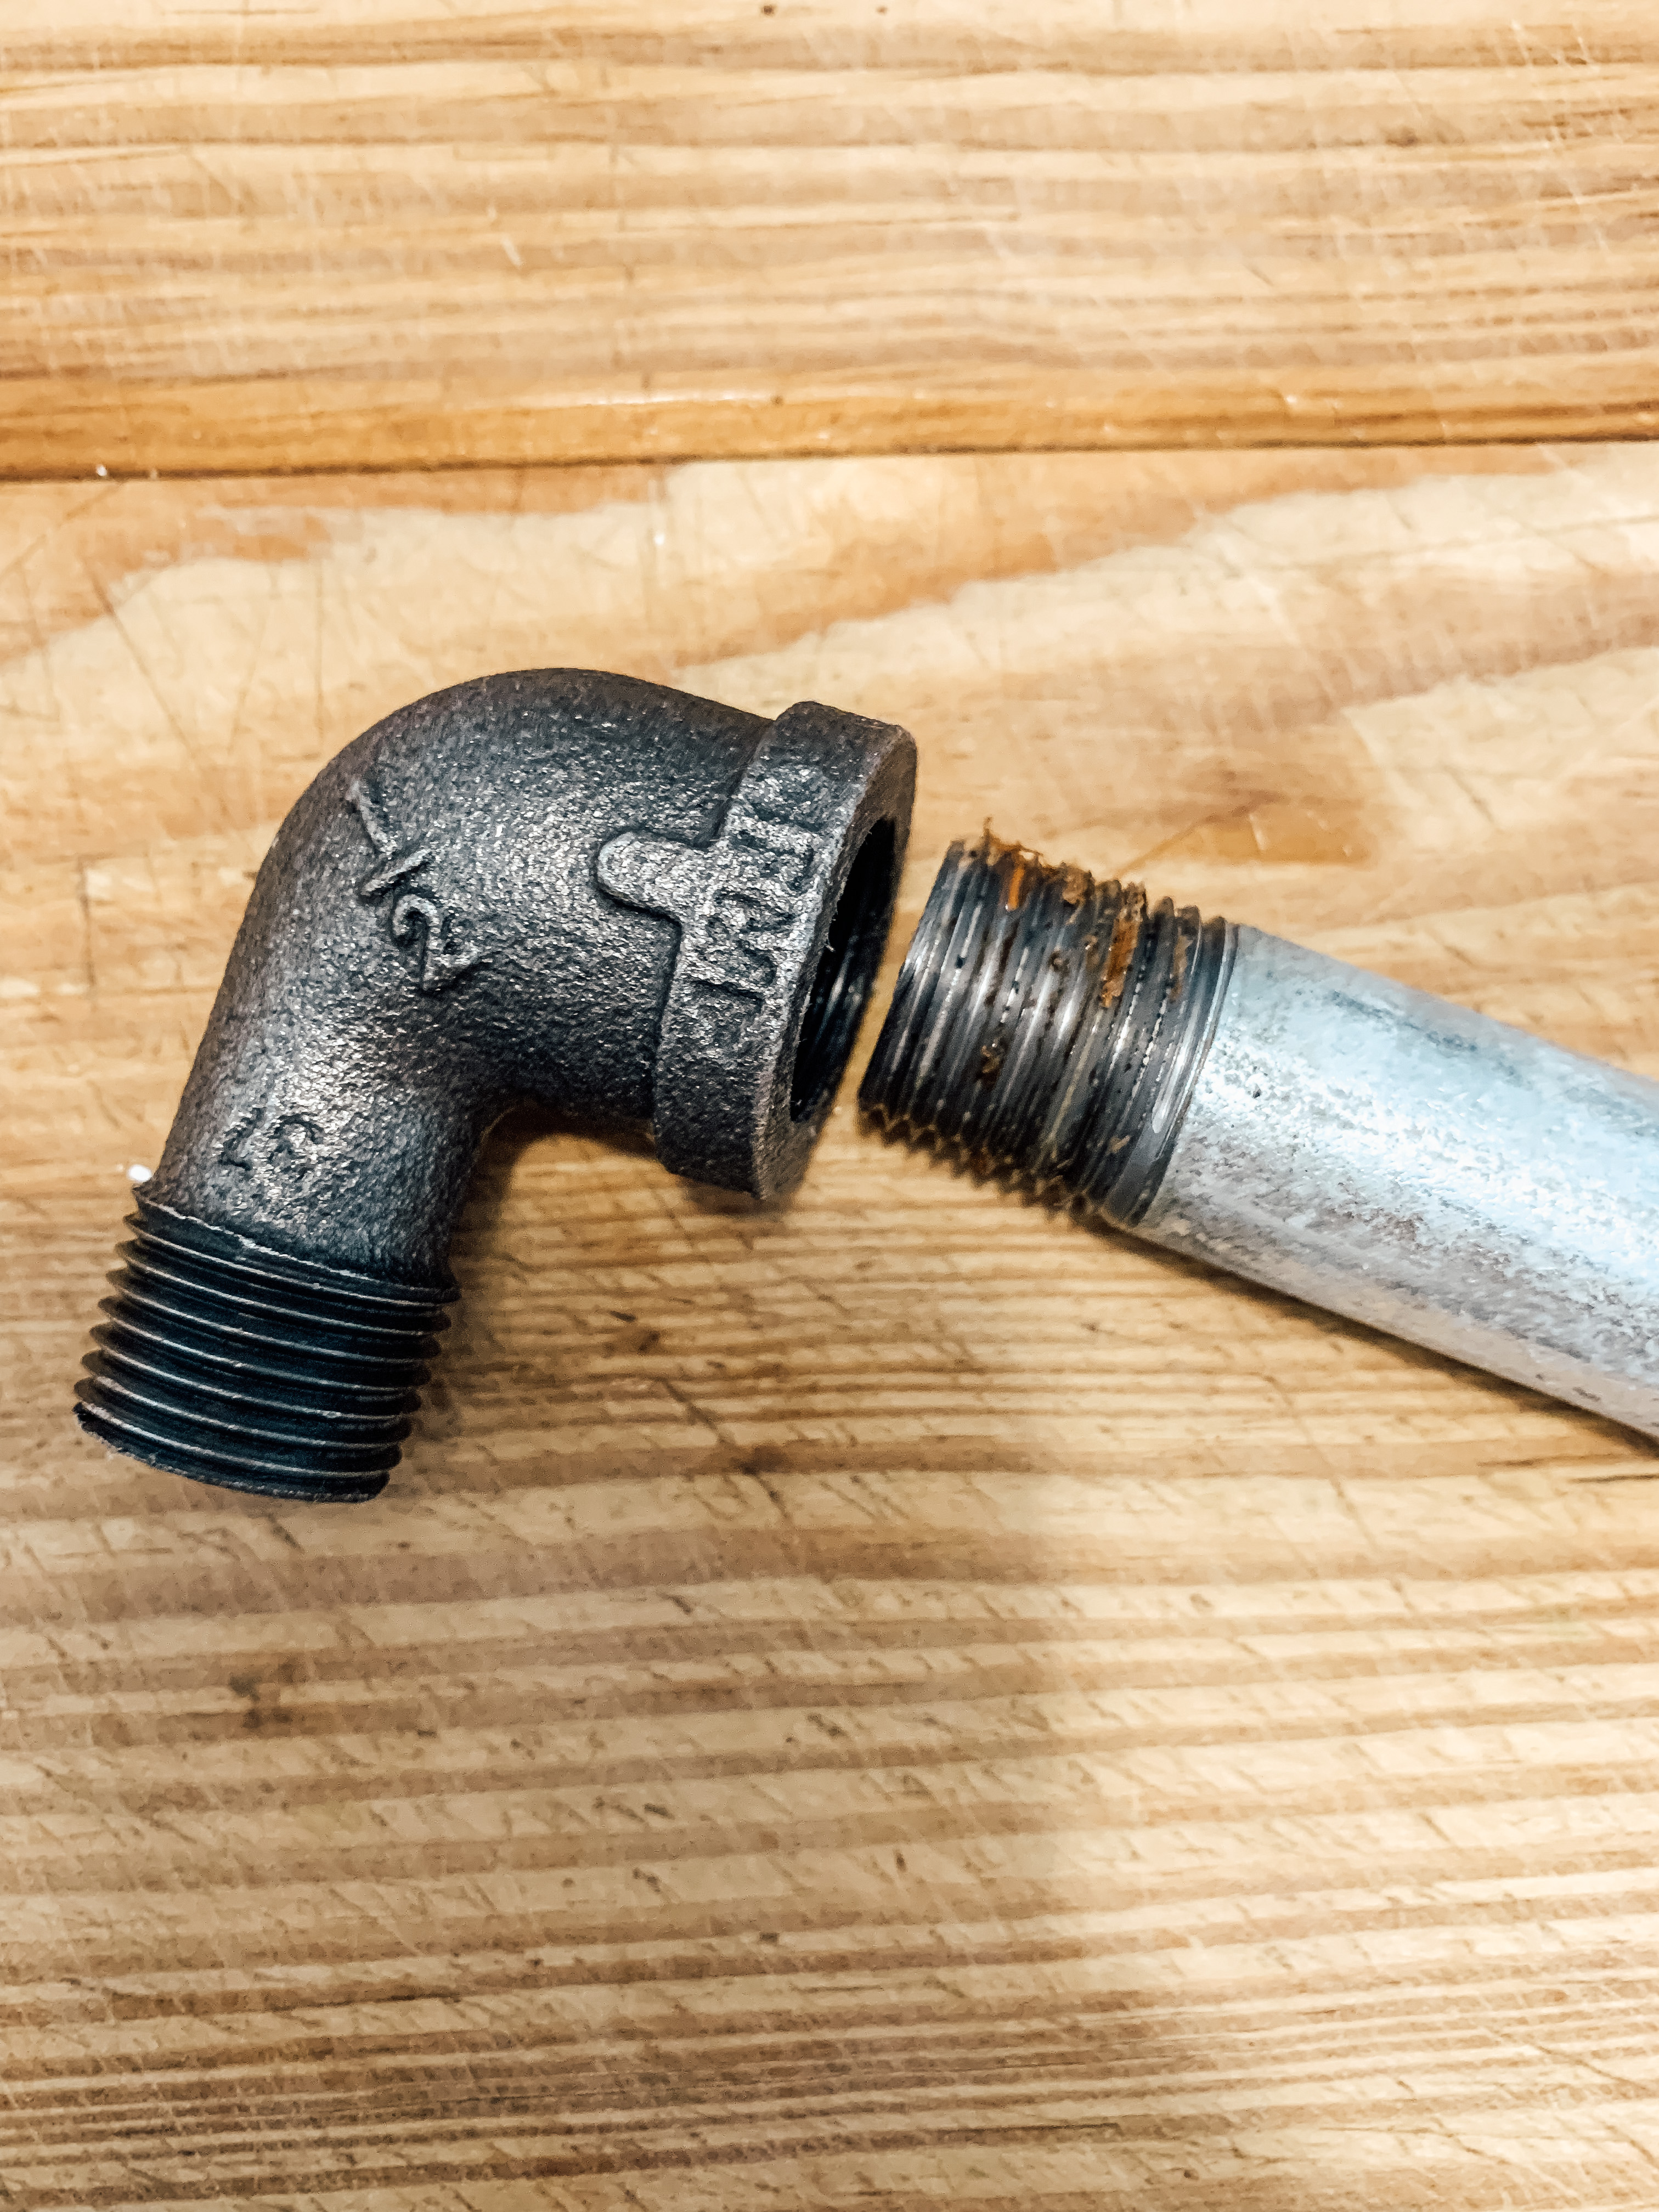
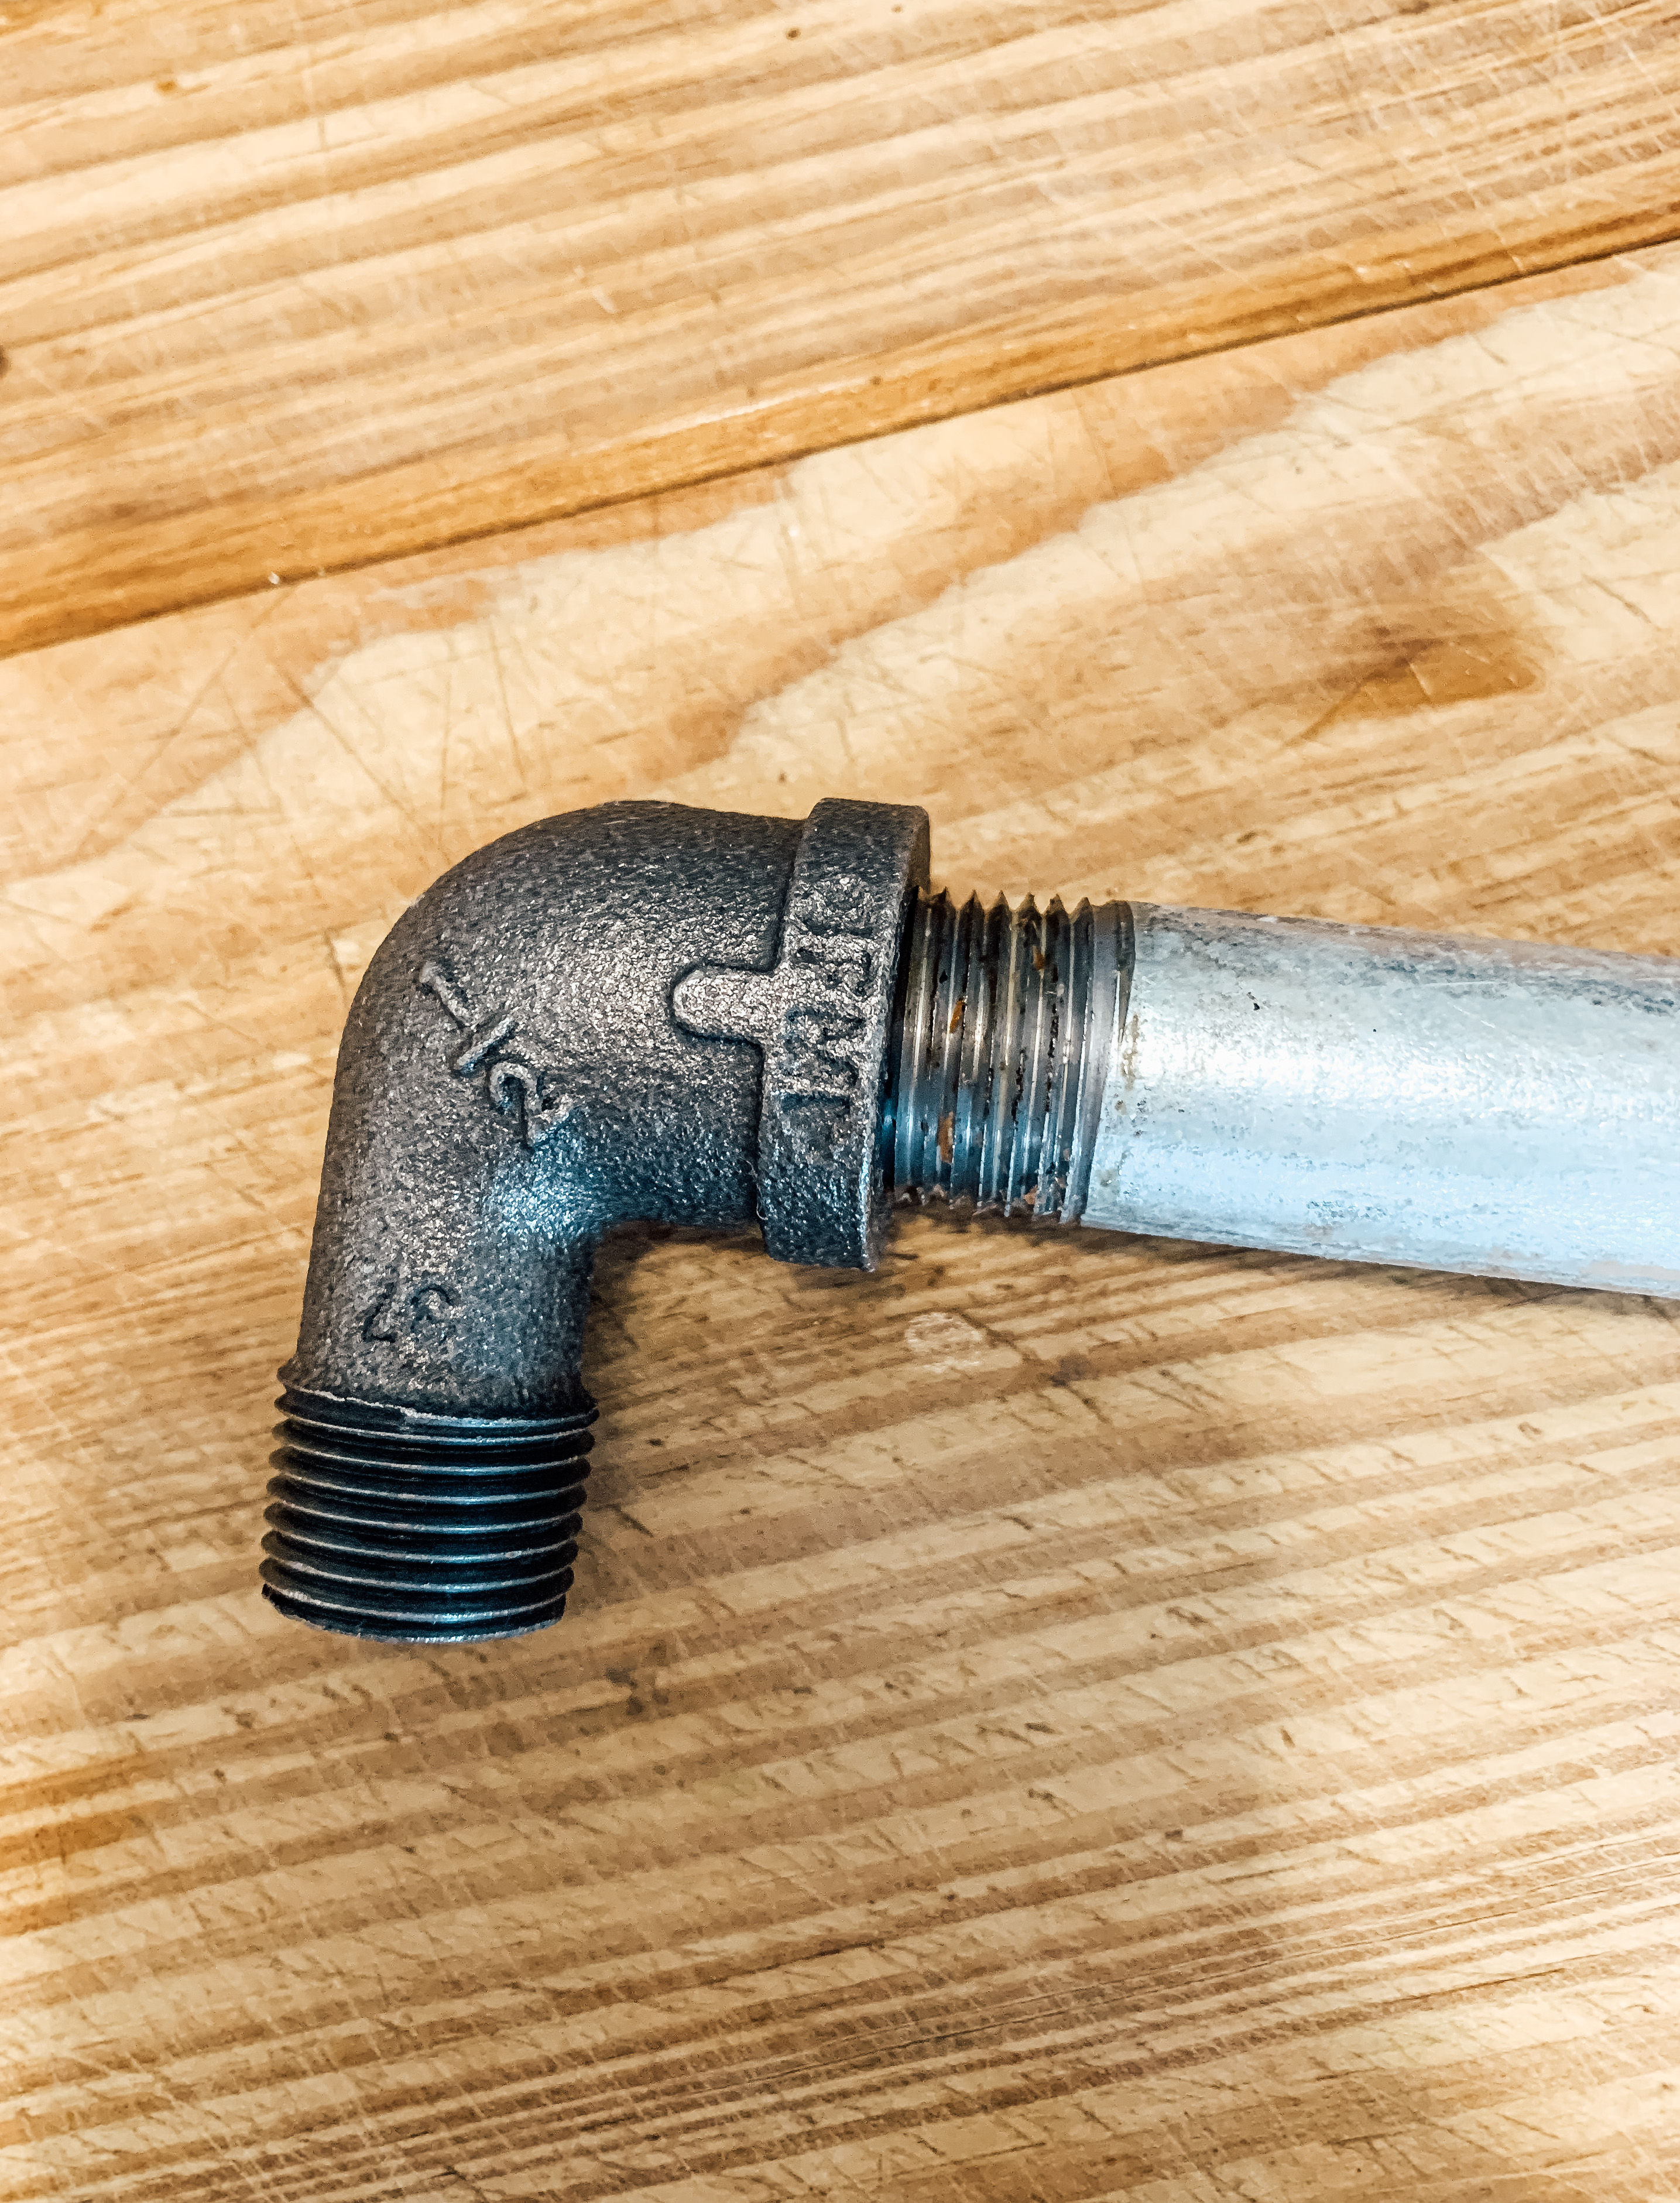
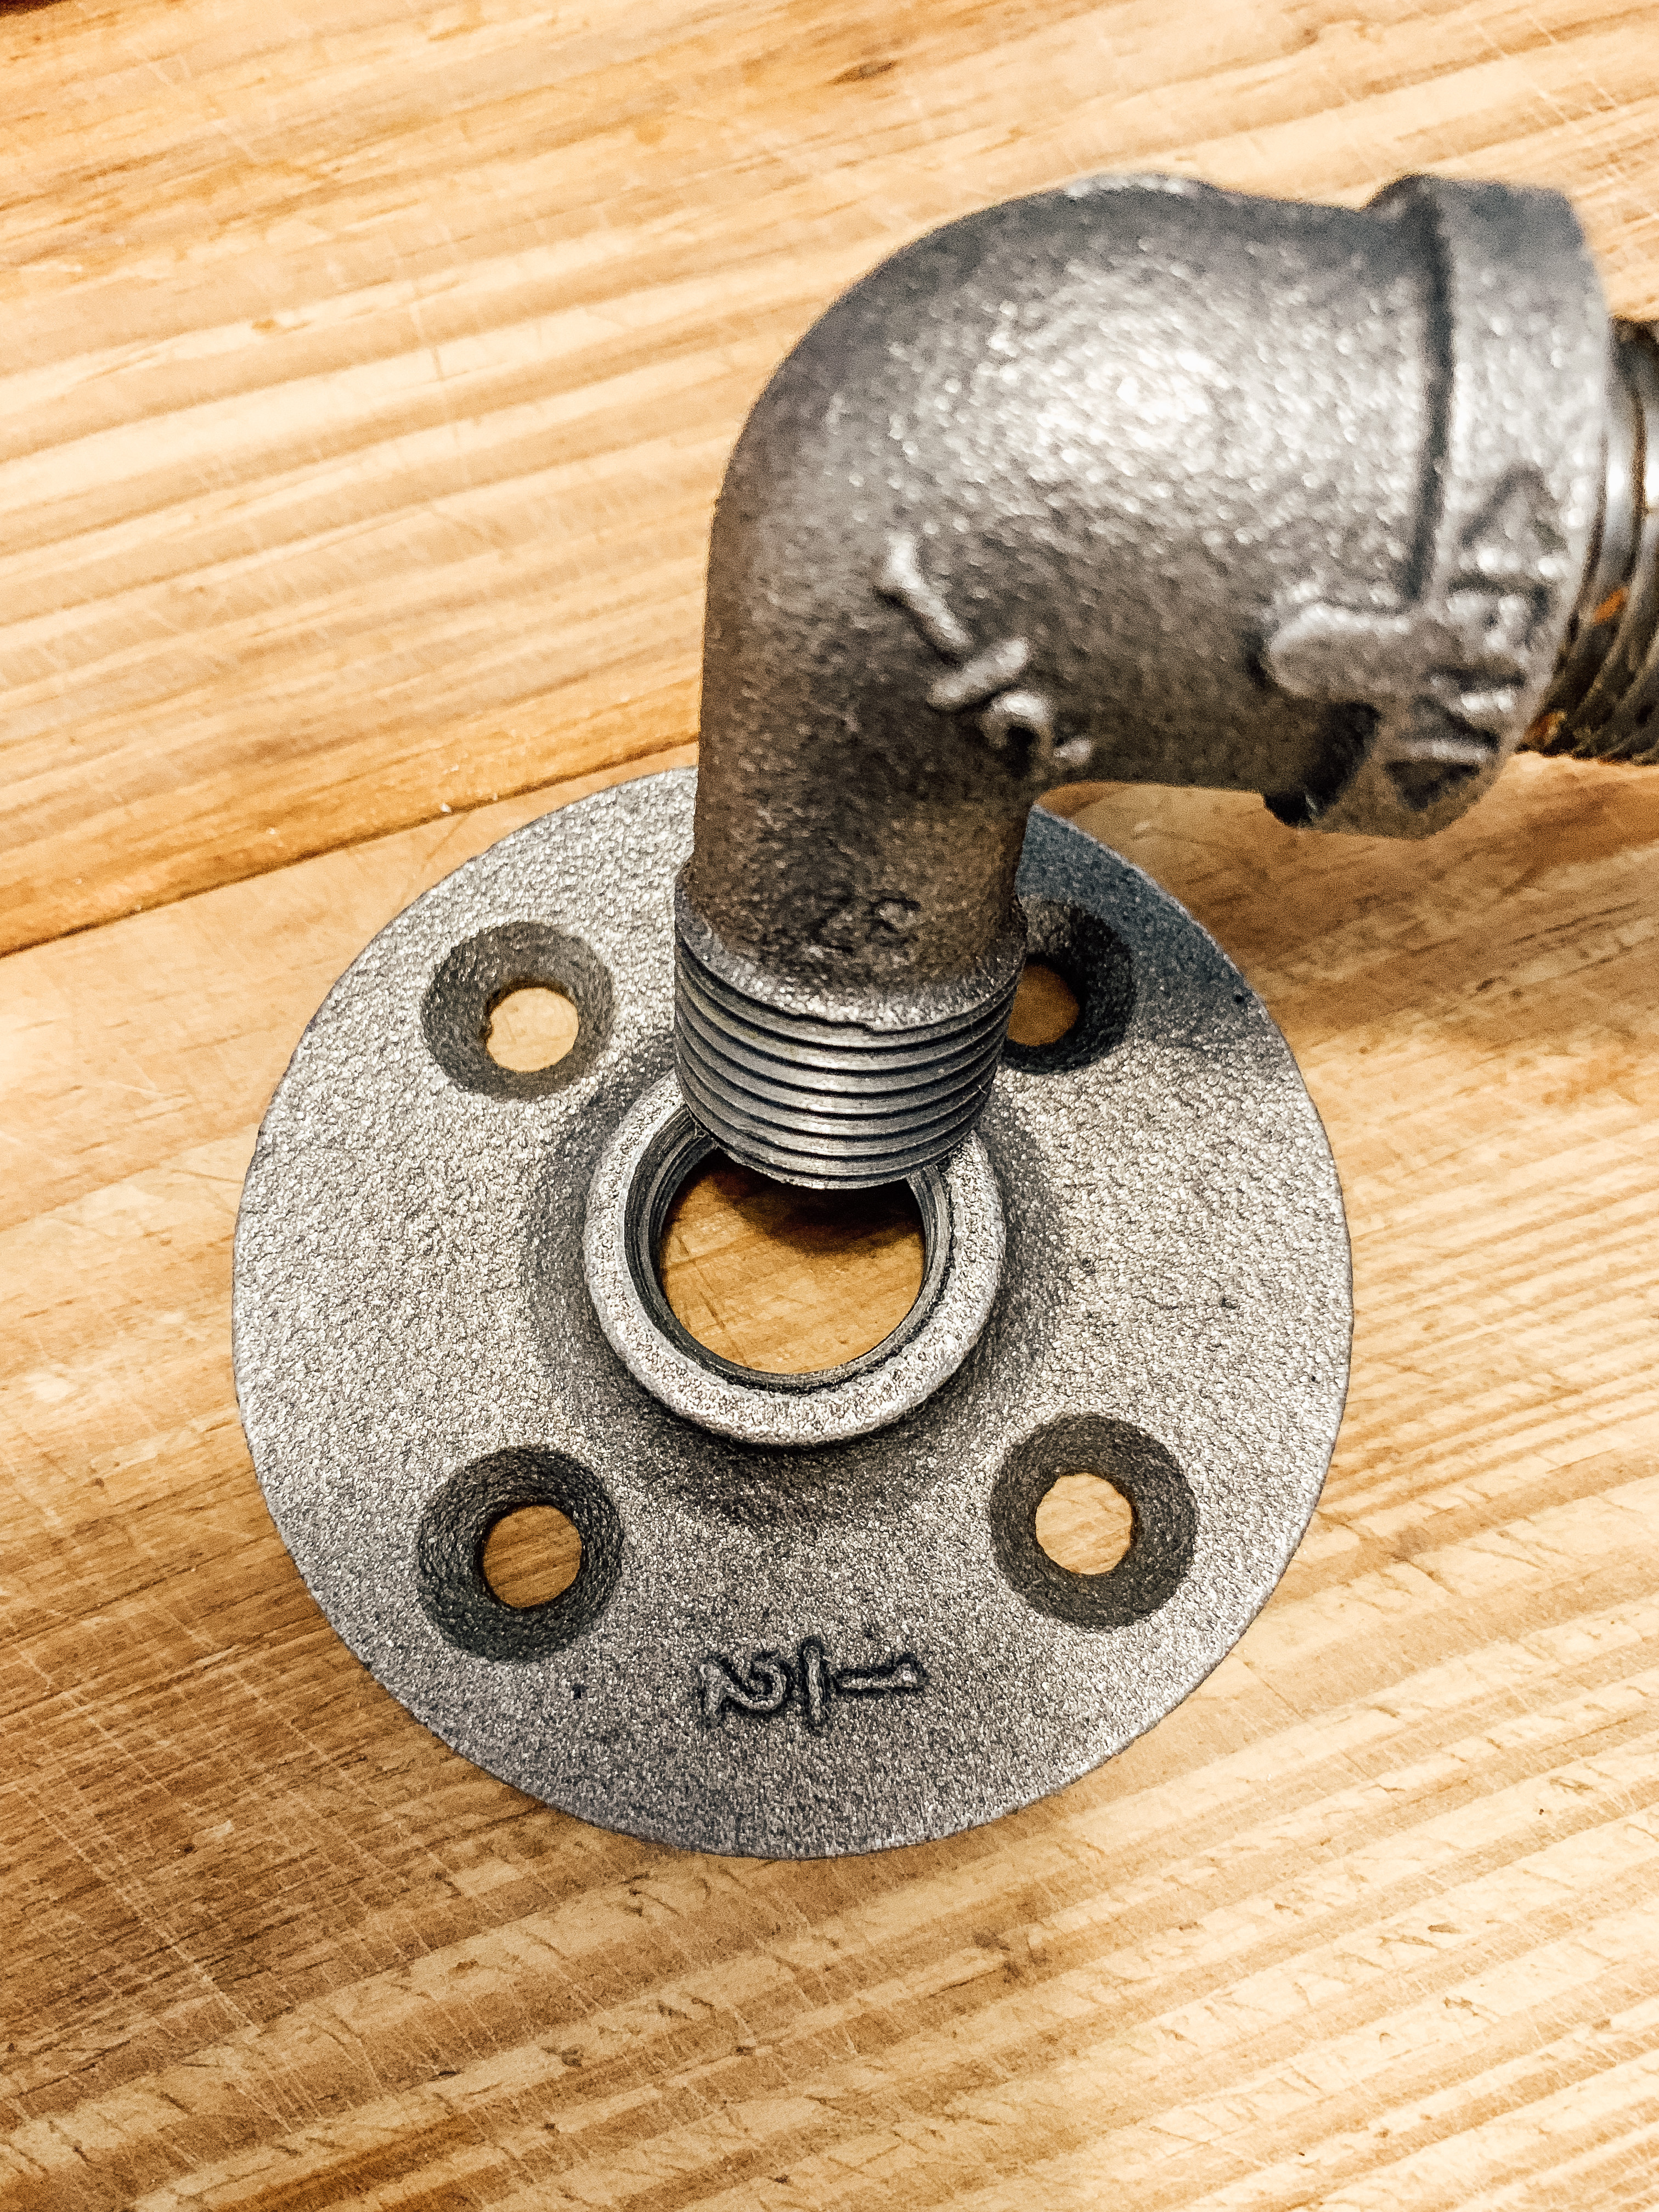
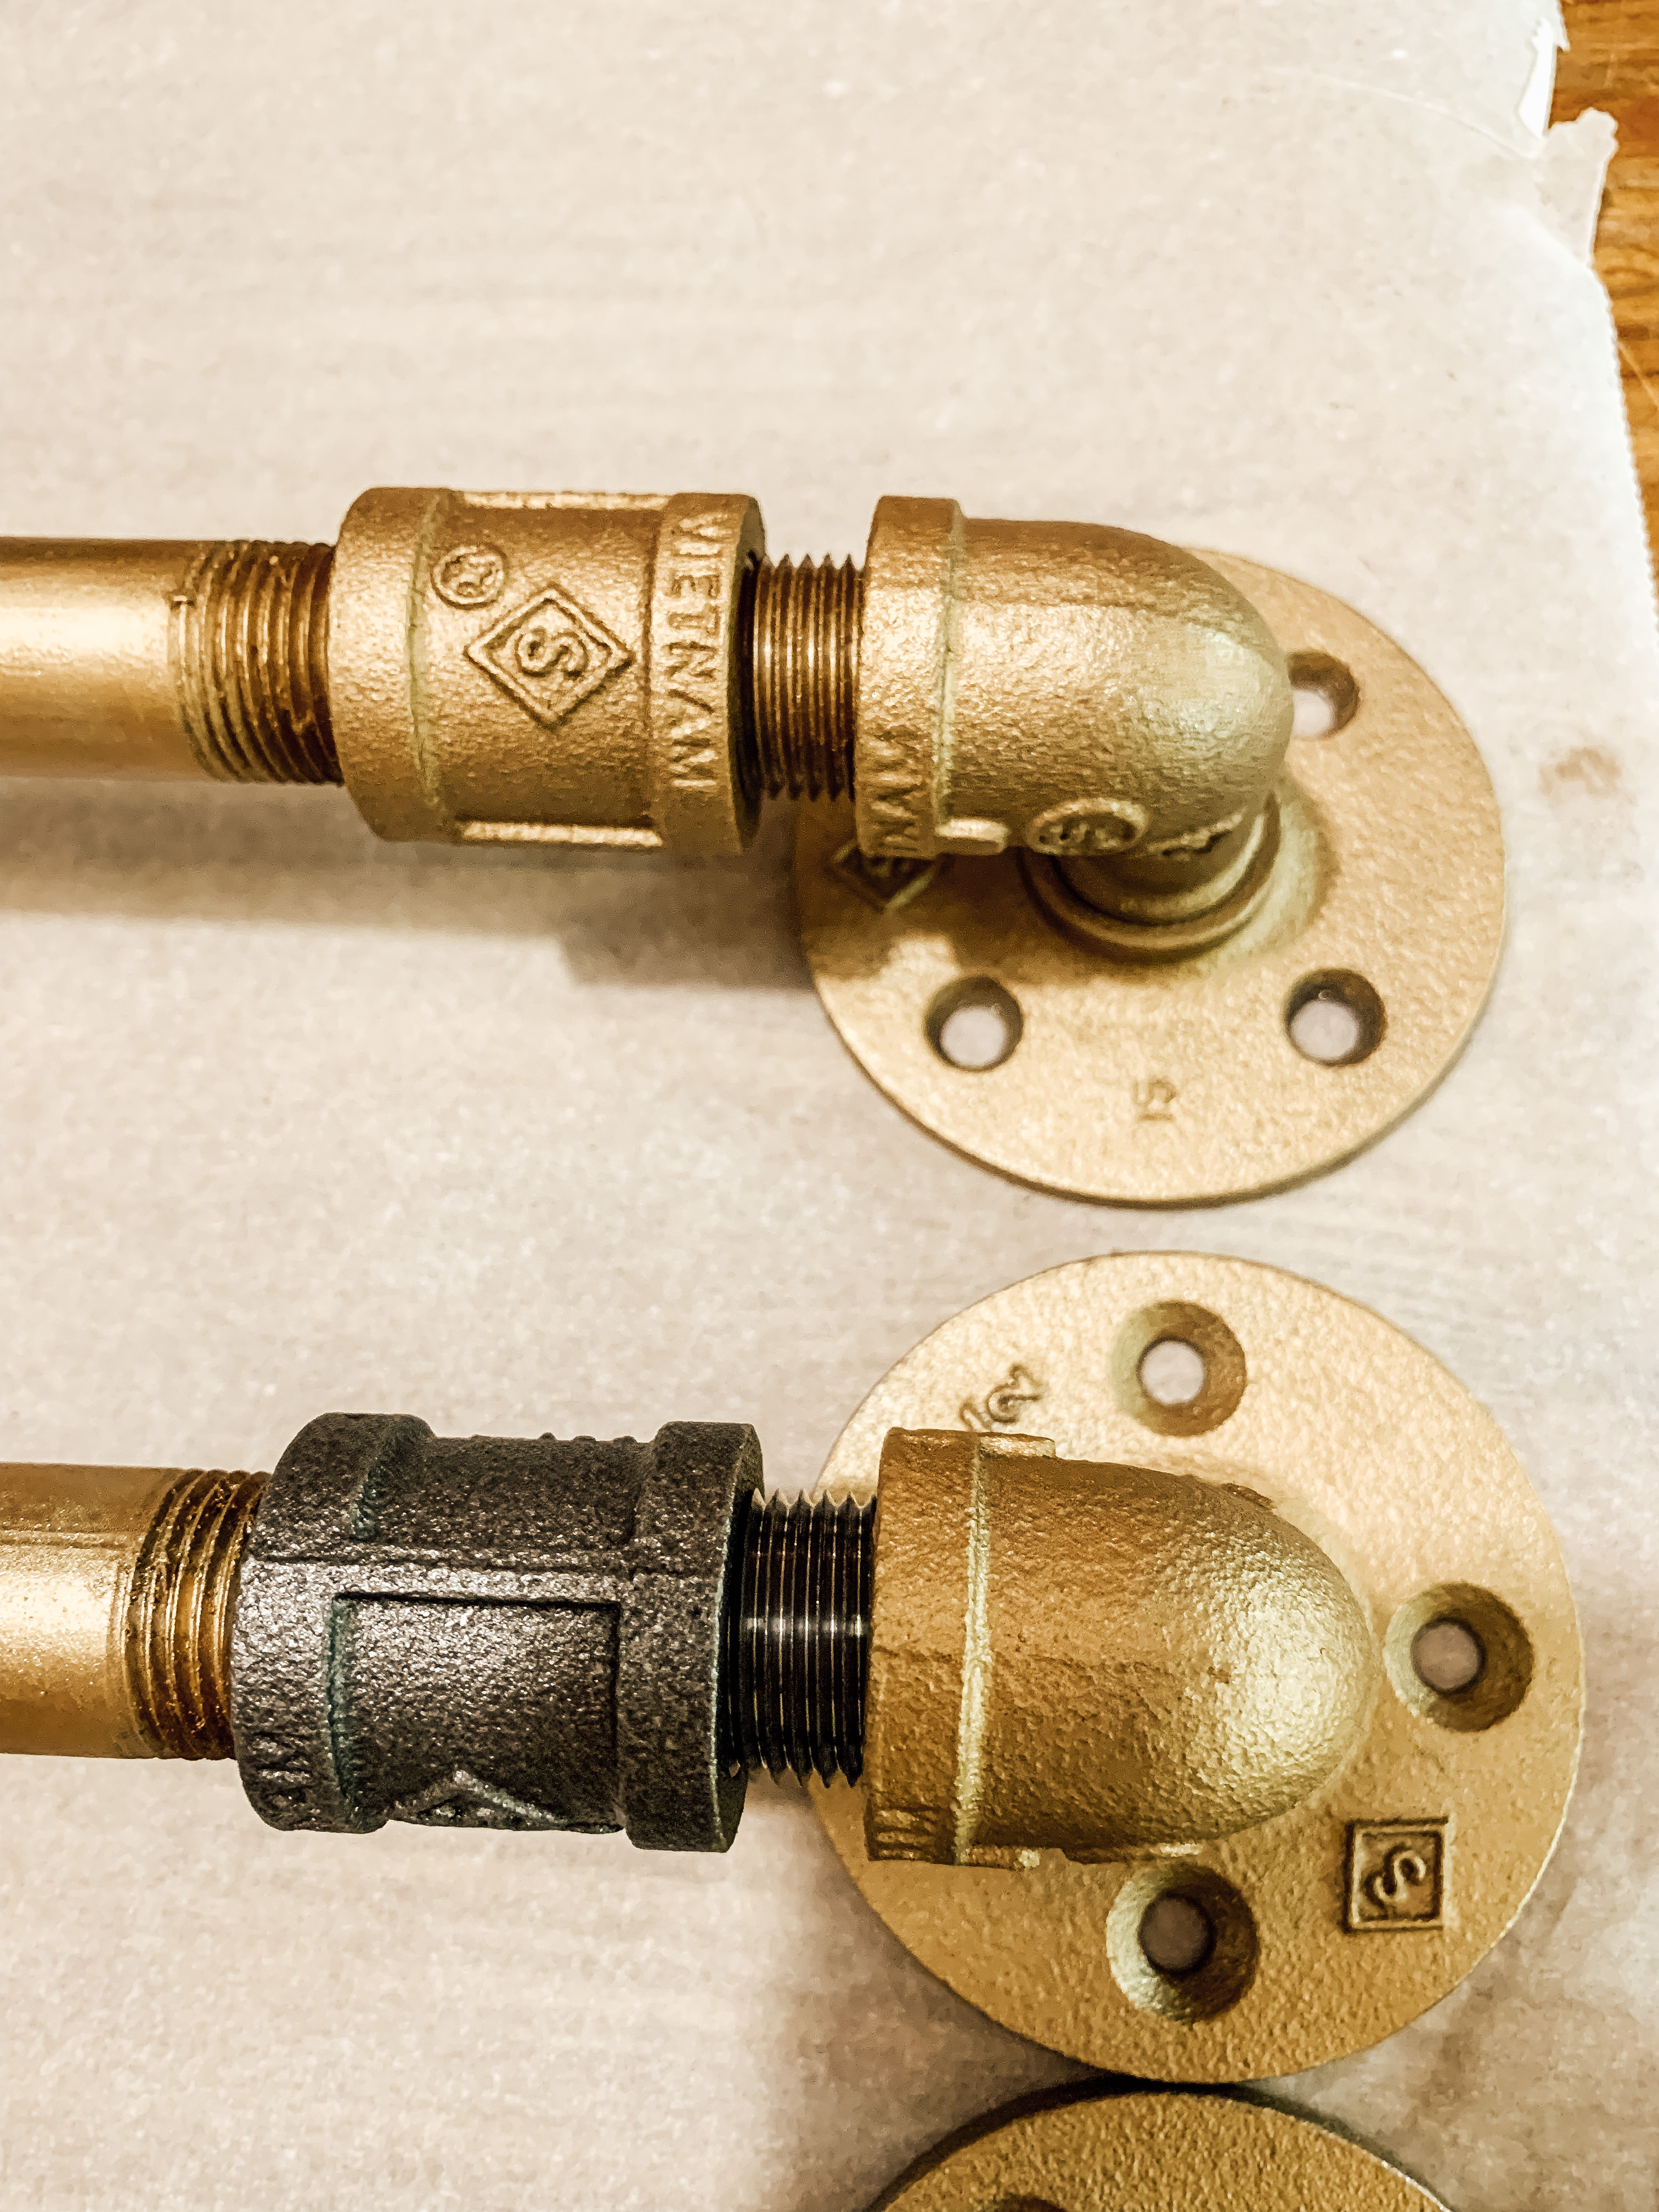
A quick trip to the hardware store plumbing aisle, and I had all the supplies I needed. I knew I wanted to make three racks so I got three 1/2 inch pipes. They come in precut/pre-threaded sizes or you can get them cut to a specific size and threaded at most stores. ( I should have done the later because I measured wrong and had to add an extender on mine however that was no big deal.) I got six 1/2 inch elbow fittings and six 1/2 inch floor flanges. (Look at me acting like I know what I’m talking about. Haha)

I sprayed all the pieces with Dawn soap, let them sit awhile and rinsed them off. This removes the oils that are on them which prevents them from rusting. I knew I wanted to paint mine and the paint would not stick if they were oily. Once they were dry, I assembled the pieces.
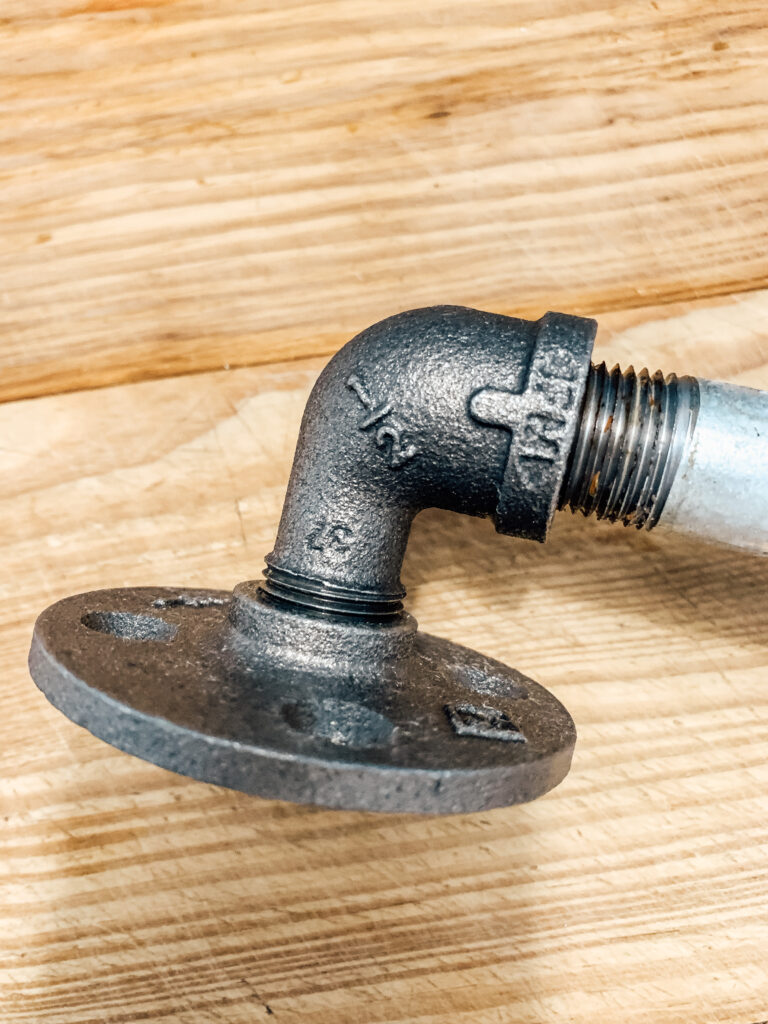
Once assembled as shown in the pictures, I hung them on my wall making sure to attach them to a stud in the wall or used dry wall anchors where it didn’t meet a stud.
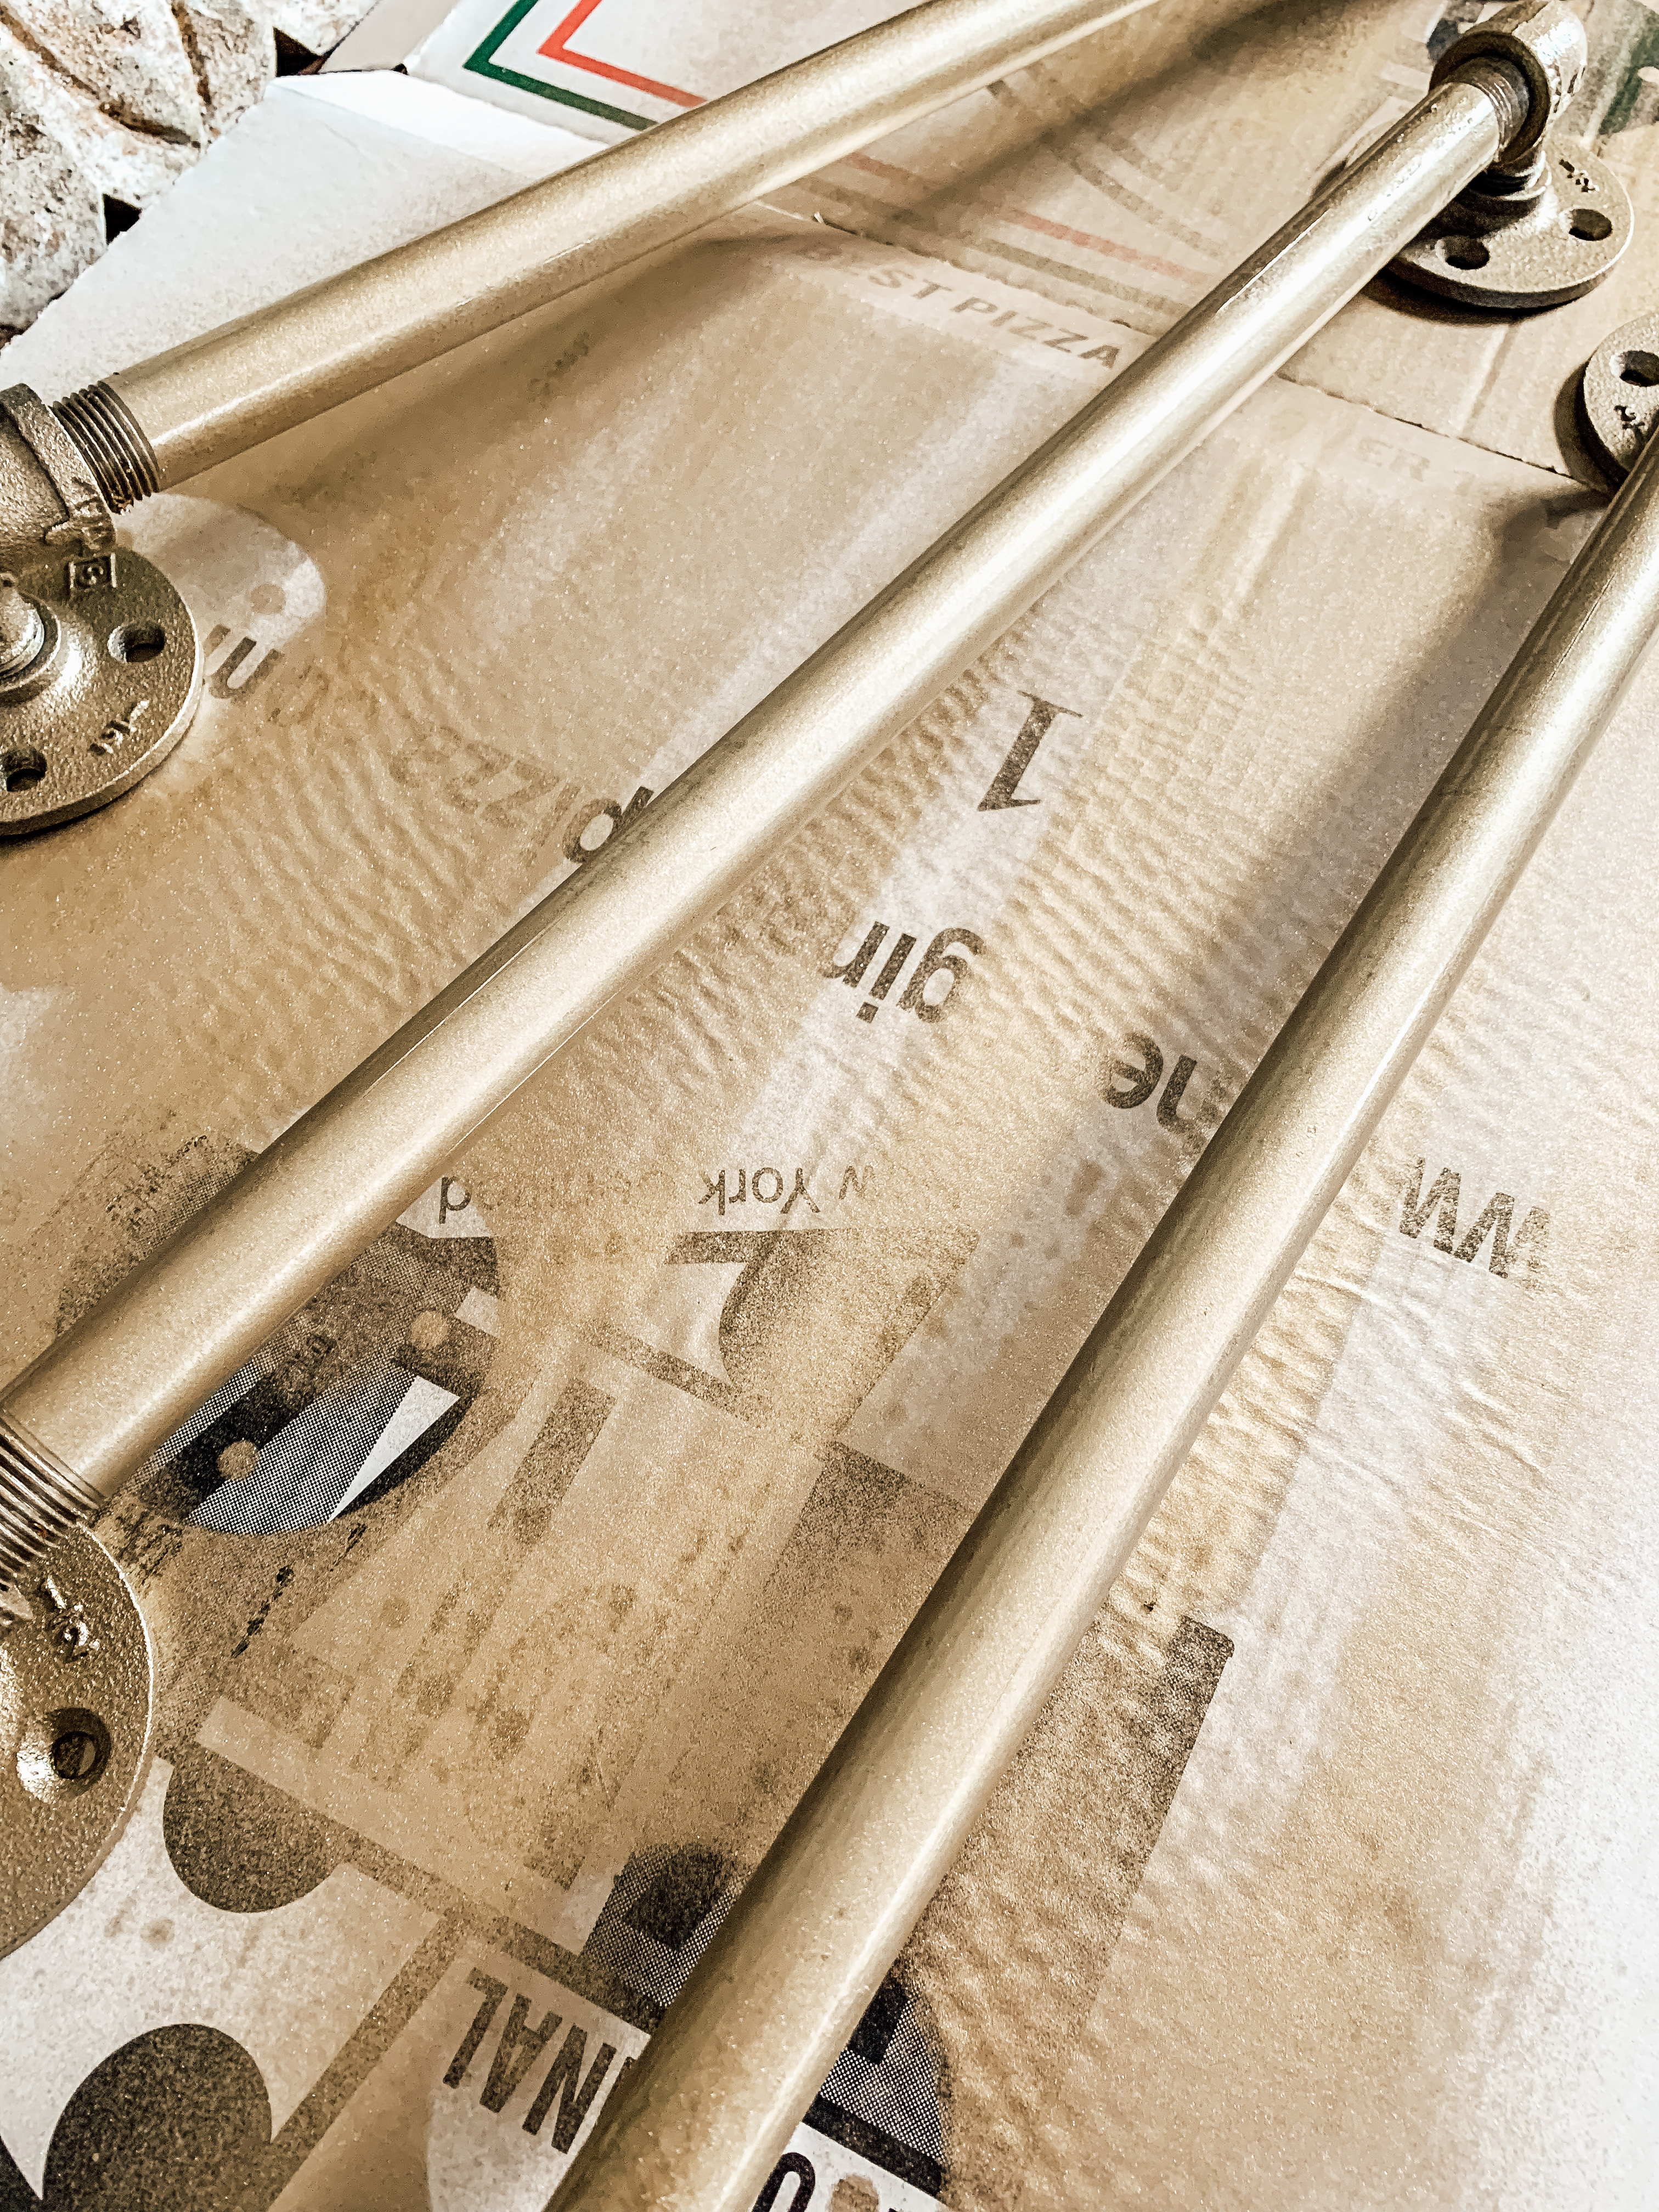
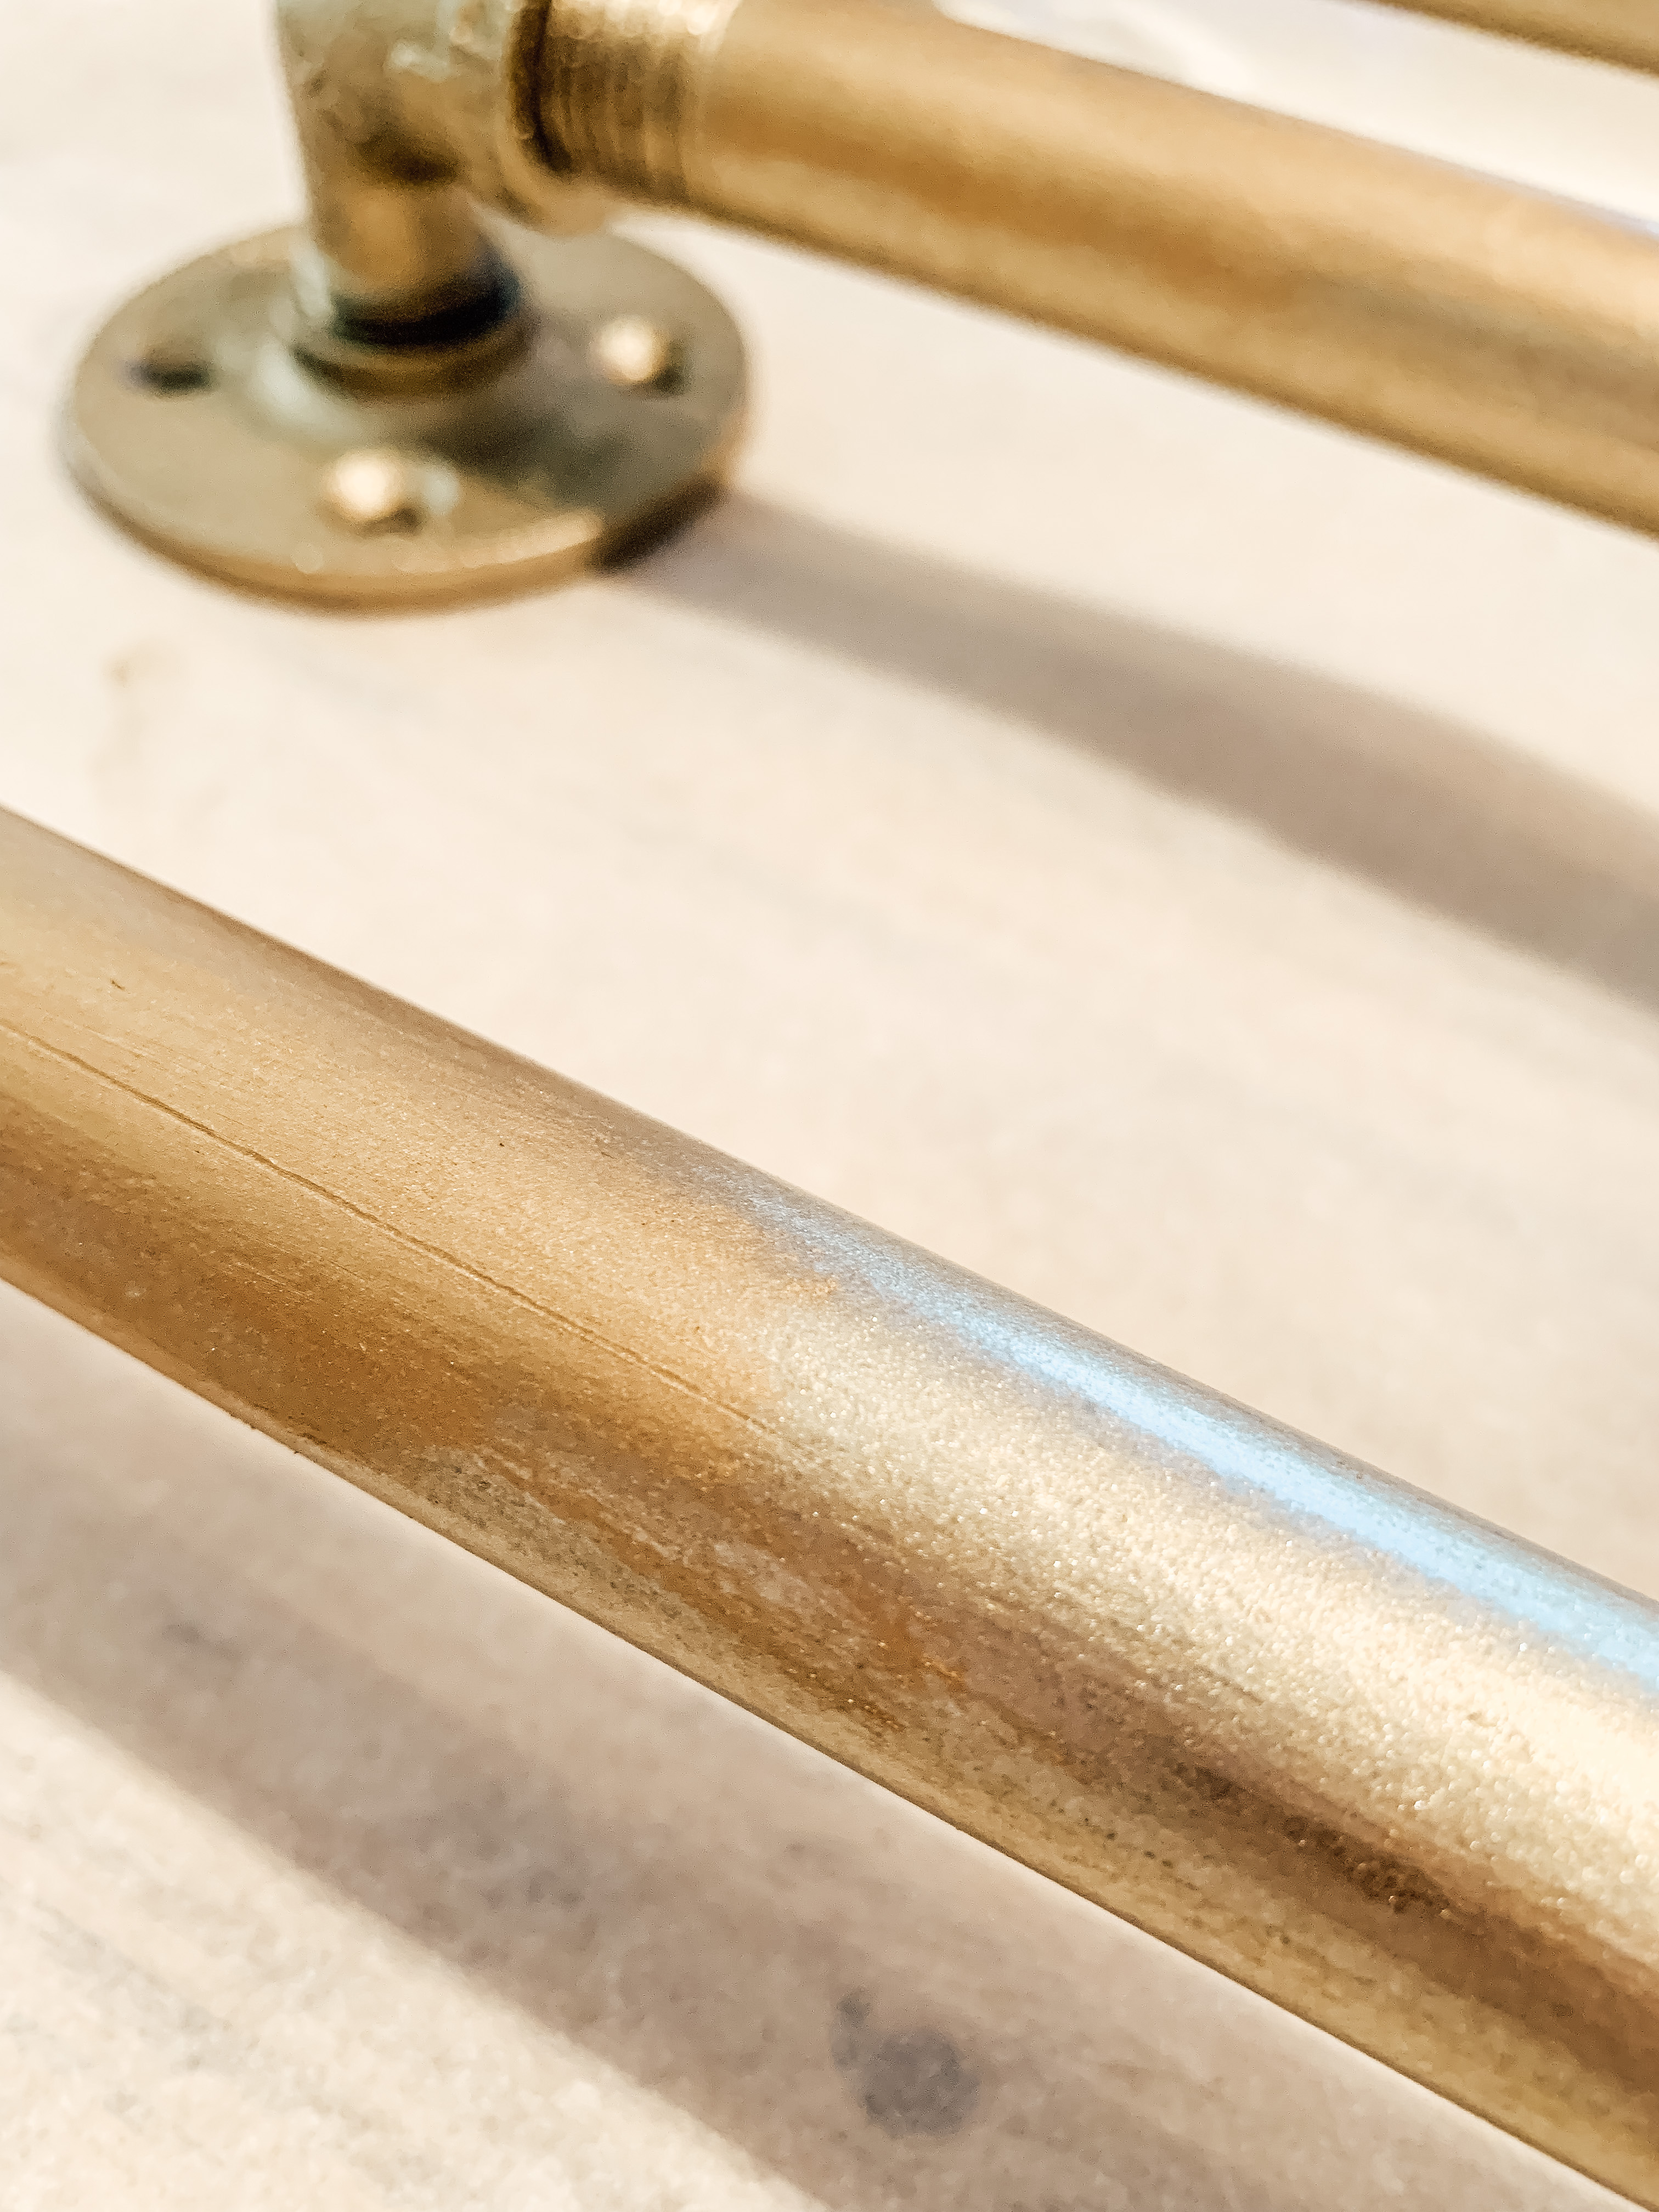
After I was sure that they would fit properly , I sprayed all the parts with some gold spray paint that I had on hand. The color didn’t matter because I was going to finish them with Rub n Buff but it sticks better if the pipe is primed with a paint first.
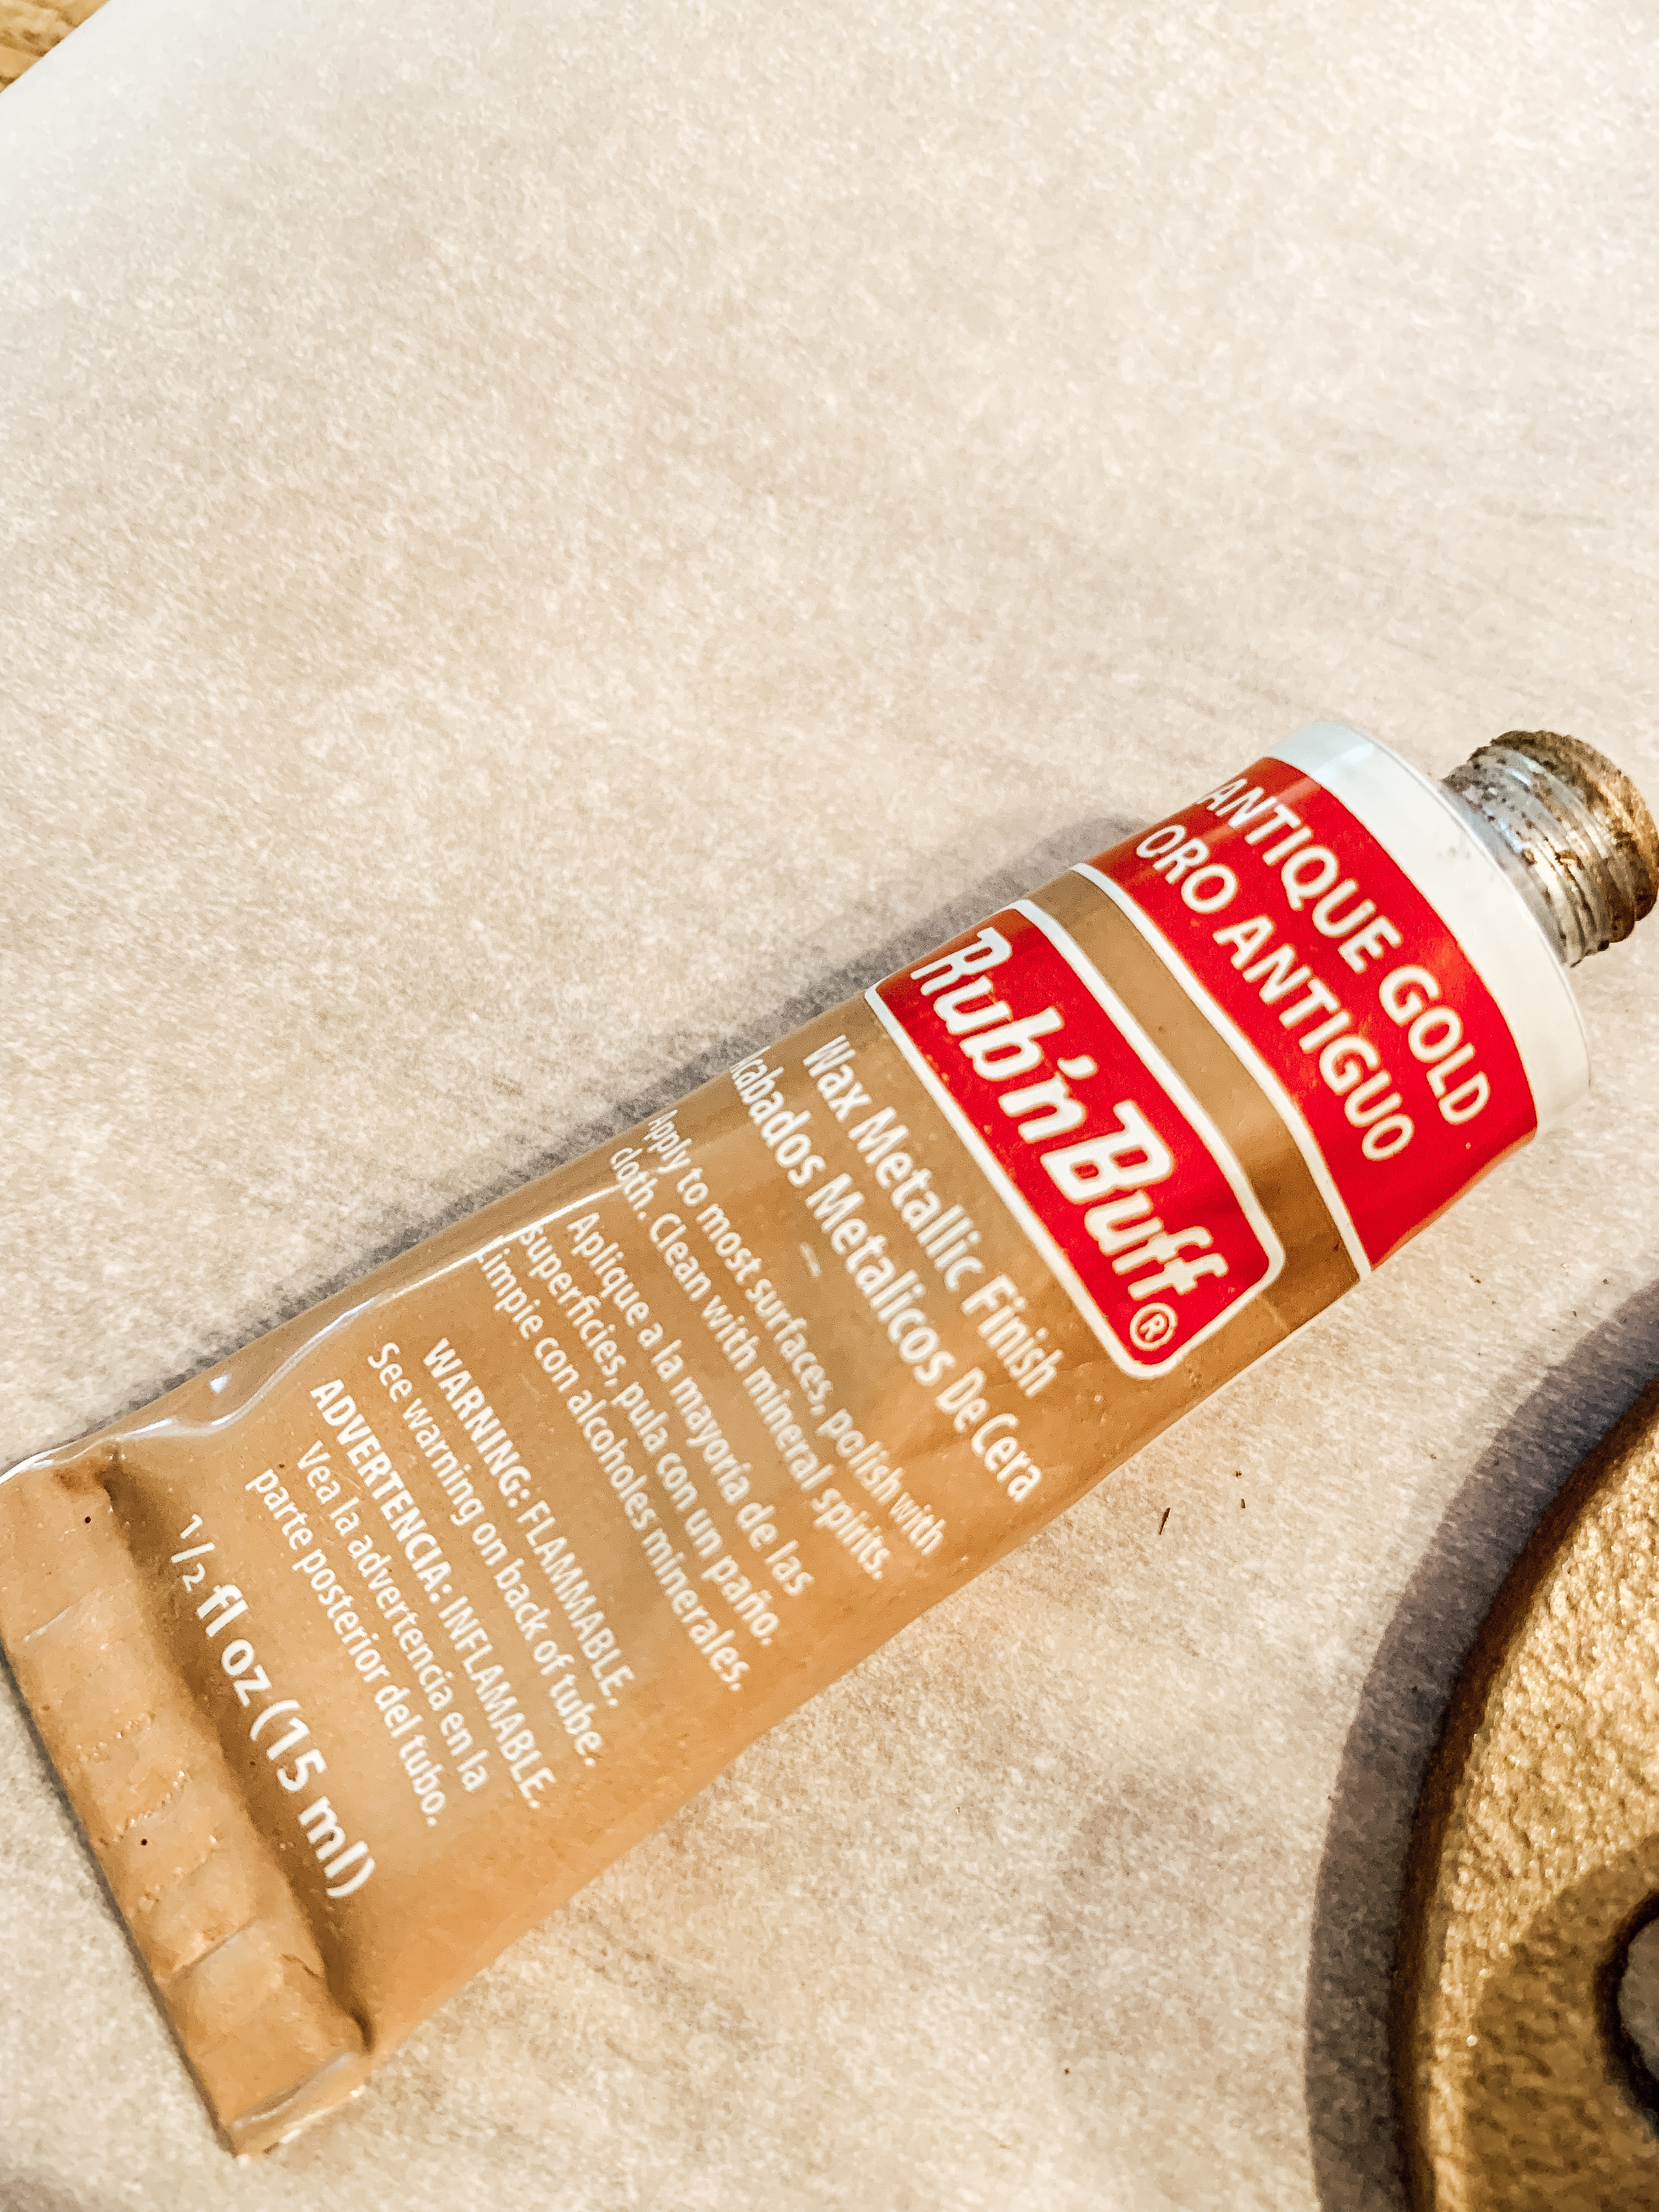
I then put Antique Gold Rub n Buff over the top of the spray paint using an old brush and my finger. This gave it the vintage patina I was looking for.
The hooks were purchased from Amazon and snap right over the pipes. I added the pots and pans and BOOM, my pot rack was complete!
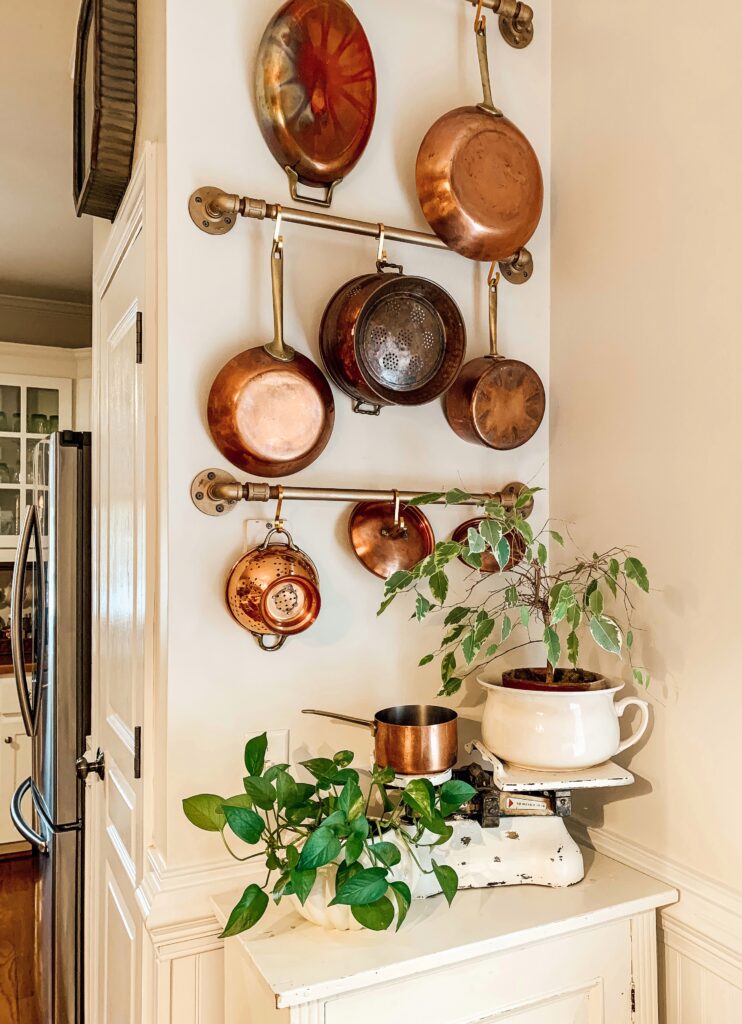
The project took no time at all. Waiting on the paint to dry took the longest. I’m very pleased with how it turned out. I don’t know who the Uncle Chef is but I certainly appreciate his fine taste in cookware.
Feel free to comment below with any questions you may have. As always, I appreciate you stopping by!
