
The Jig Is Up
Hello Everyone! What’s new on your end? Life here has been a little crazy and I feel like I’m running a race most of the time lately. So what do you do when you feel like you can’t catch up? If you’re me… you take on another project.
Let me start out by saying that I didn’t go looking for another project, it sort of found me. I was making my weekly rounds of hunting and gathering at our local thrift stores looking for some things to breathe new life into for my little shop in town. Since I do this often, it is rare that I find things that I really have to have for myself. On this particular day, I just couldn’t talk myself out of it…and believe me, I tried.

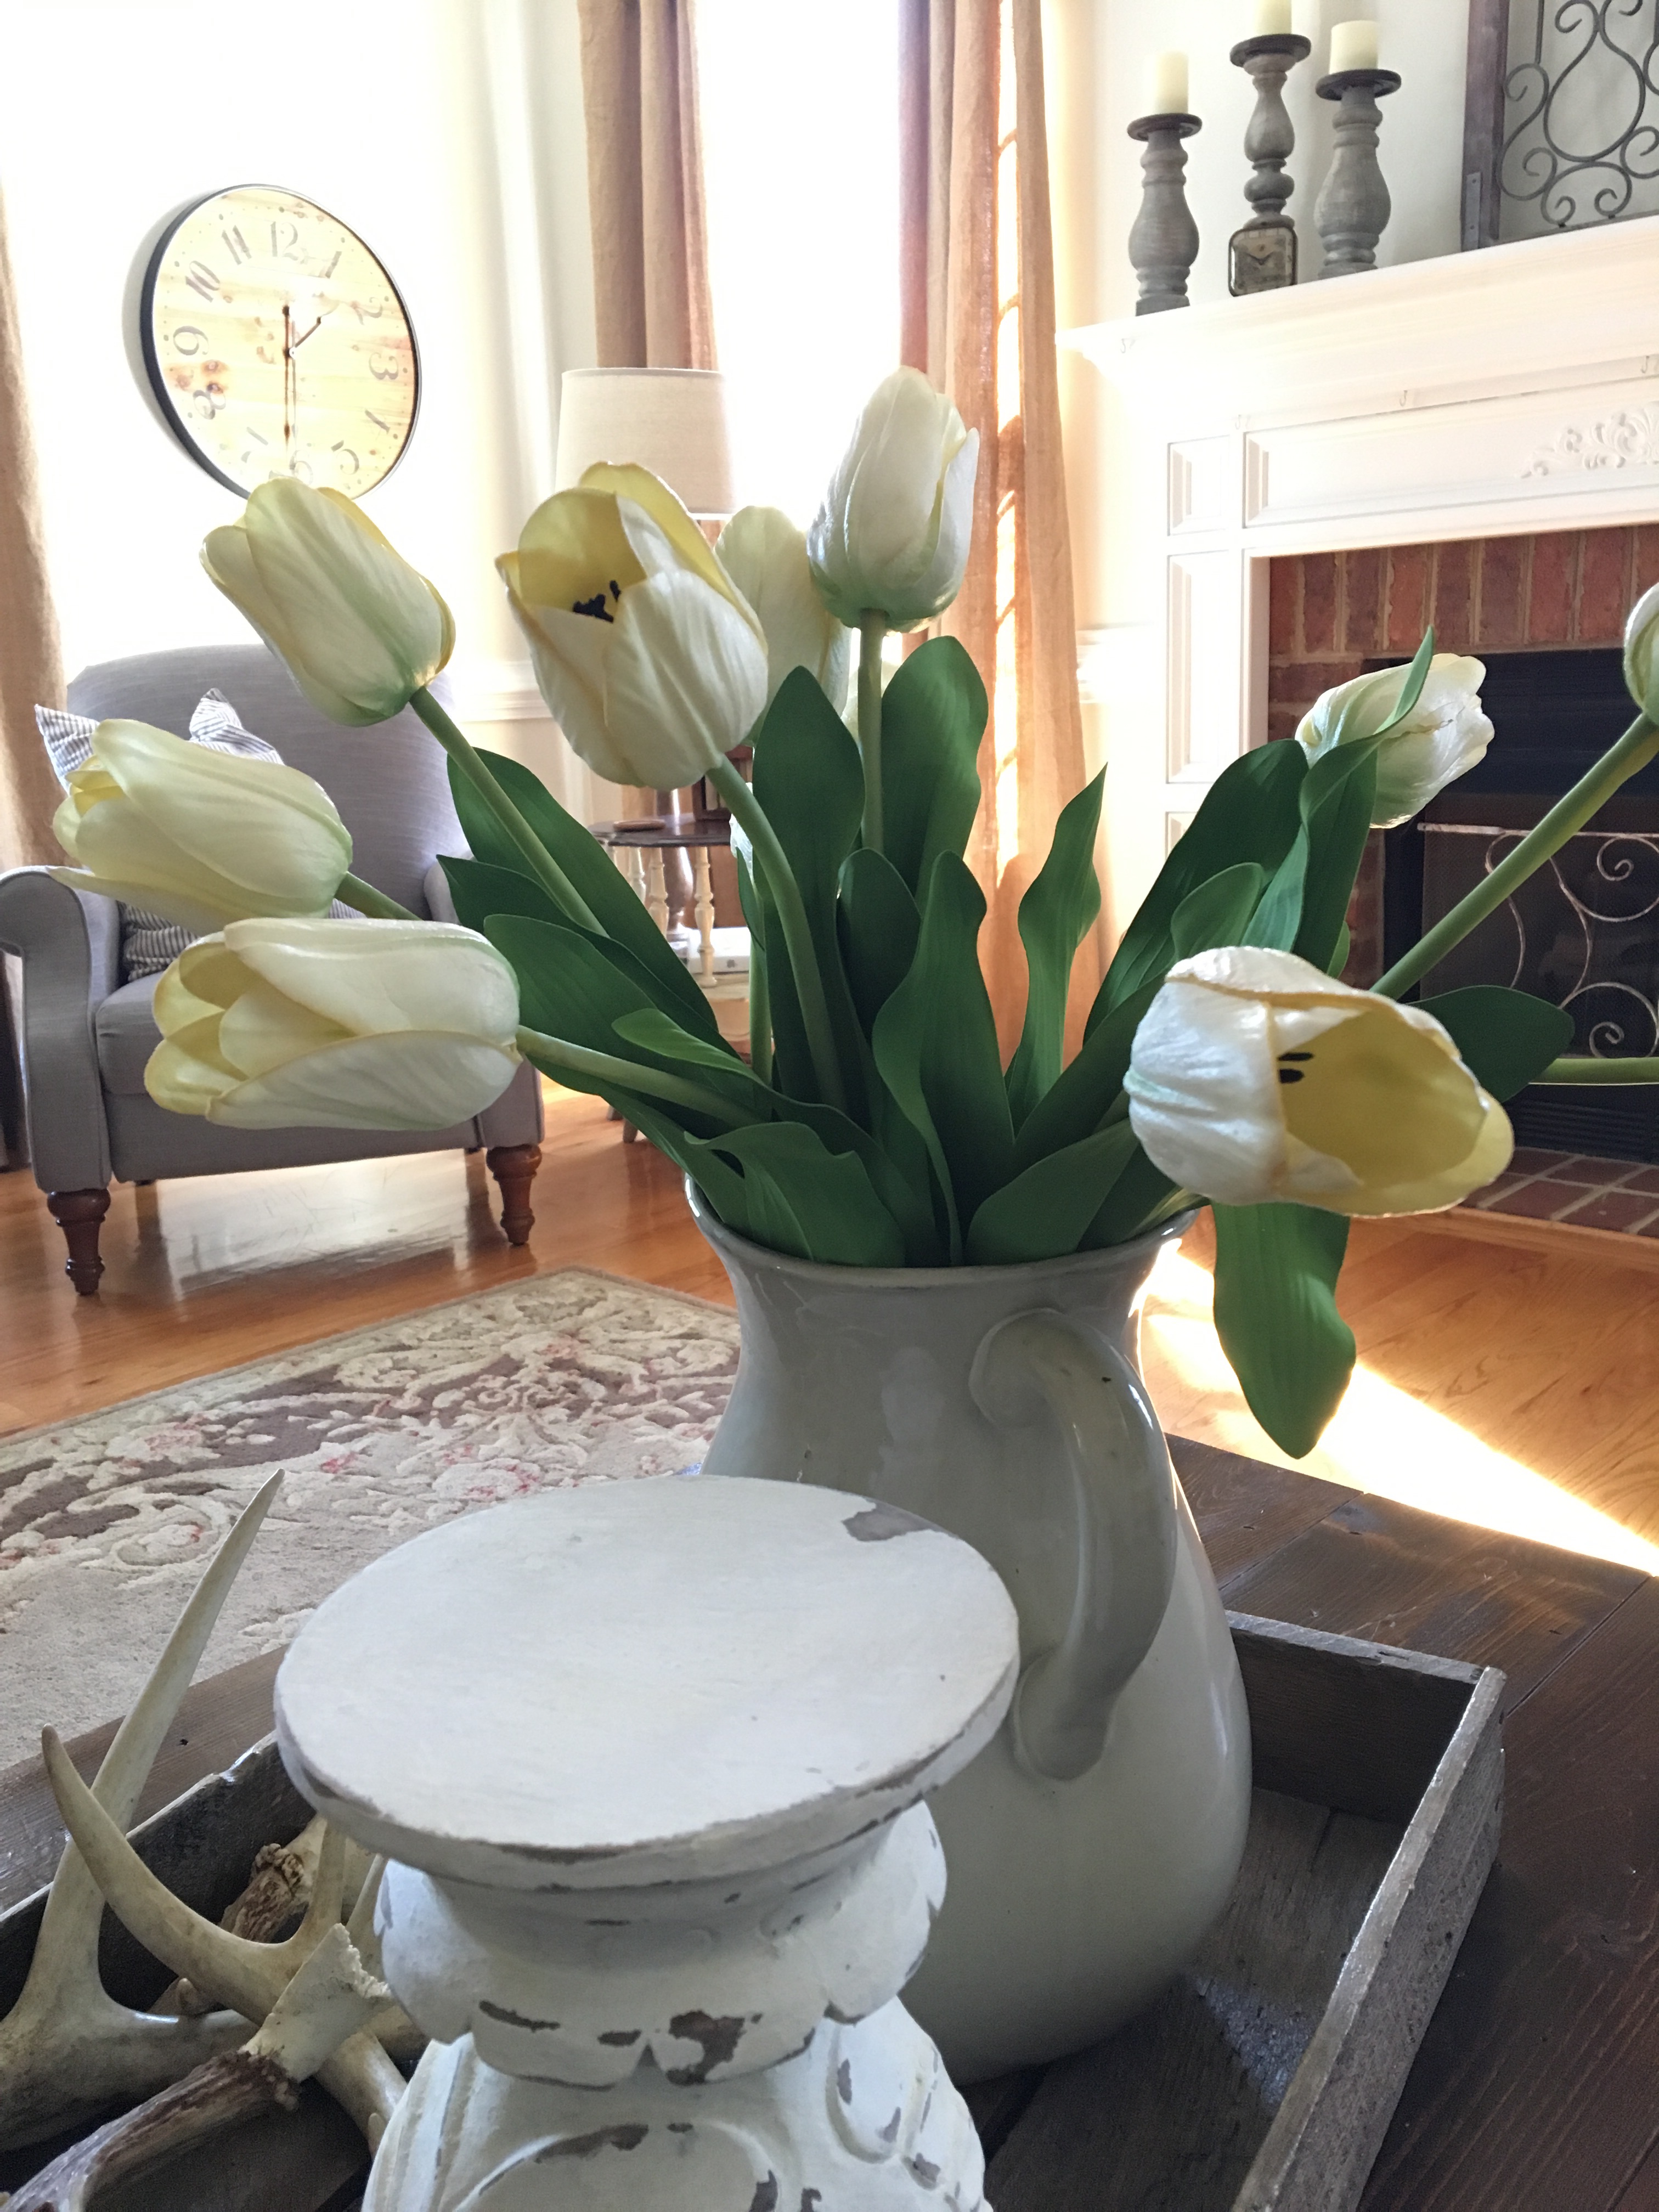
I spotted this beautiful coffee table from across the room.
Okay, maybe beautiful is a strong word for it but I was convinced with a little work, it would be gorgeous! I loved the shape of it, particularly the curvy legs. I’m a sucker for things with farmhouse flair. I didn’t care for the top of the table because it looked a little prefabricated to me and was beat up pretty bad.
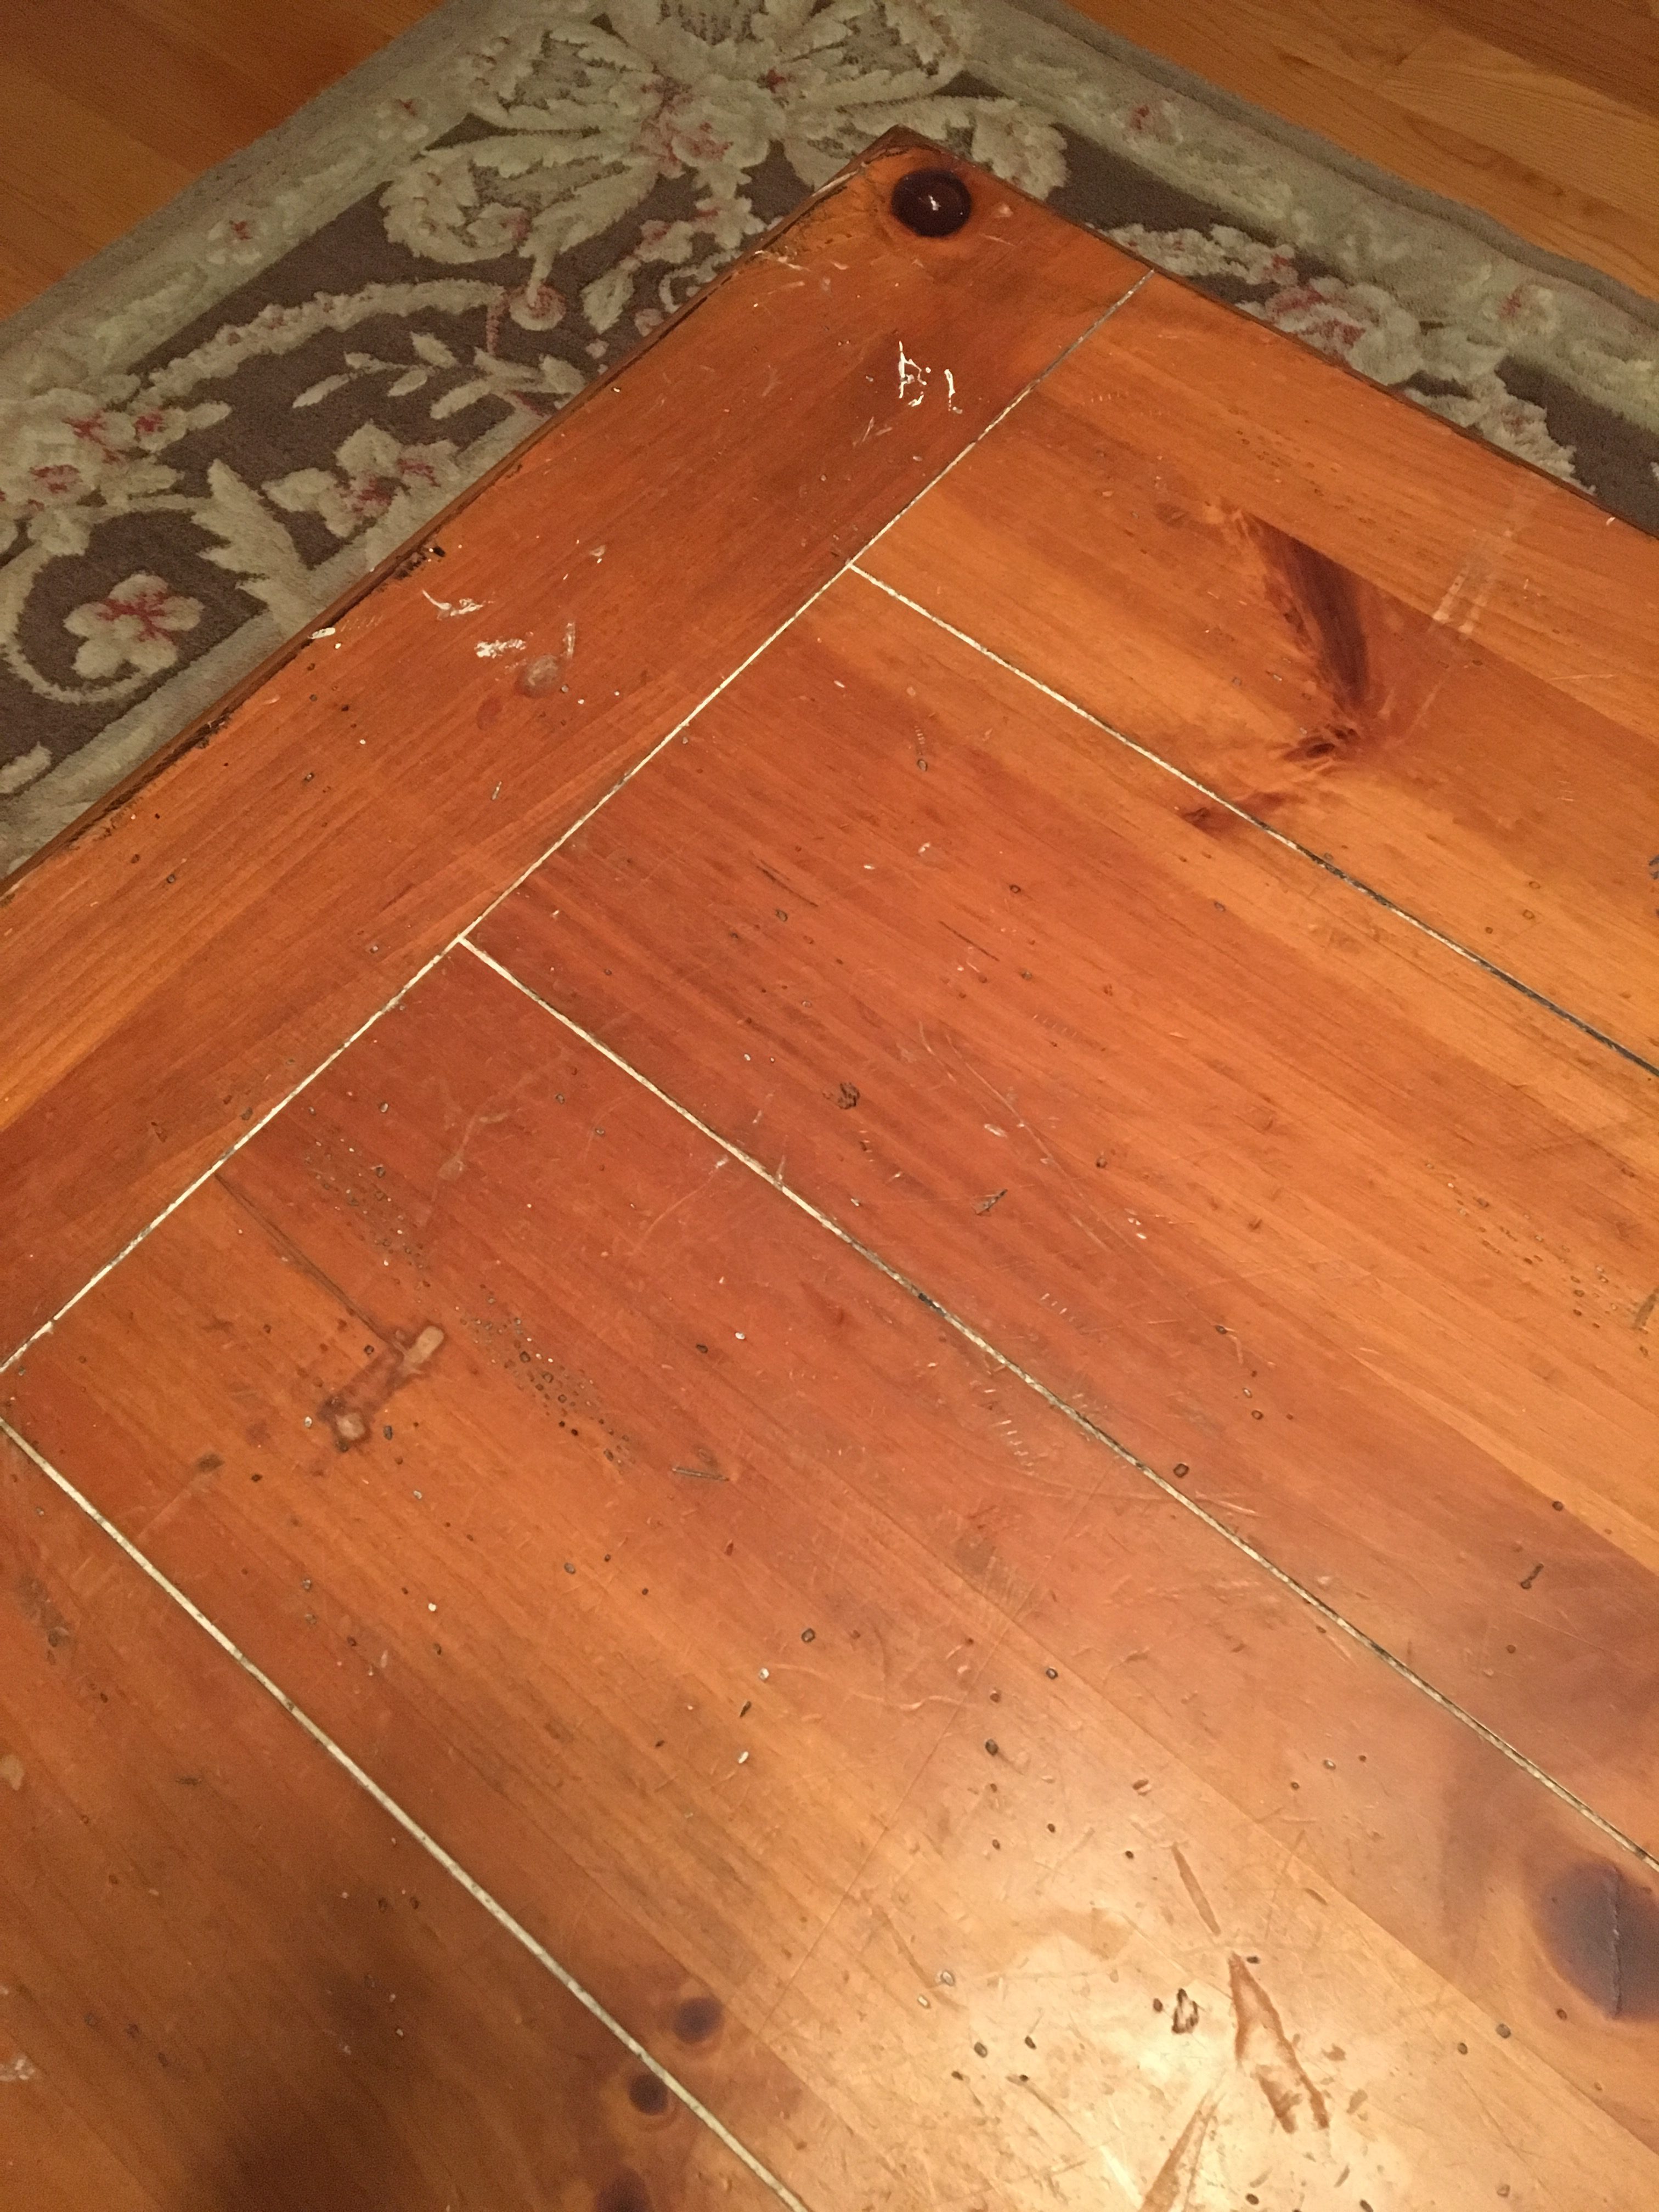
The blue playdoh smashed in the cracks of the wood didn’t help either. I also didn’t care for the color of the wood because it looked a little too orange for my liking. Again, with a little work, it would be perfect.
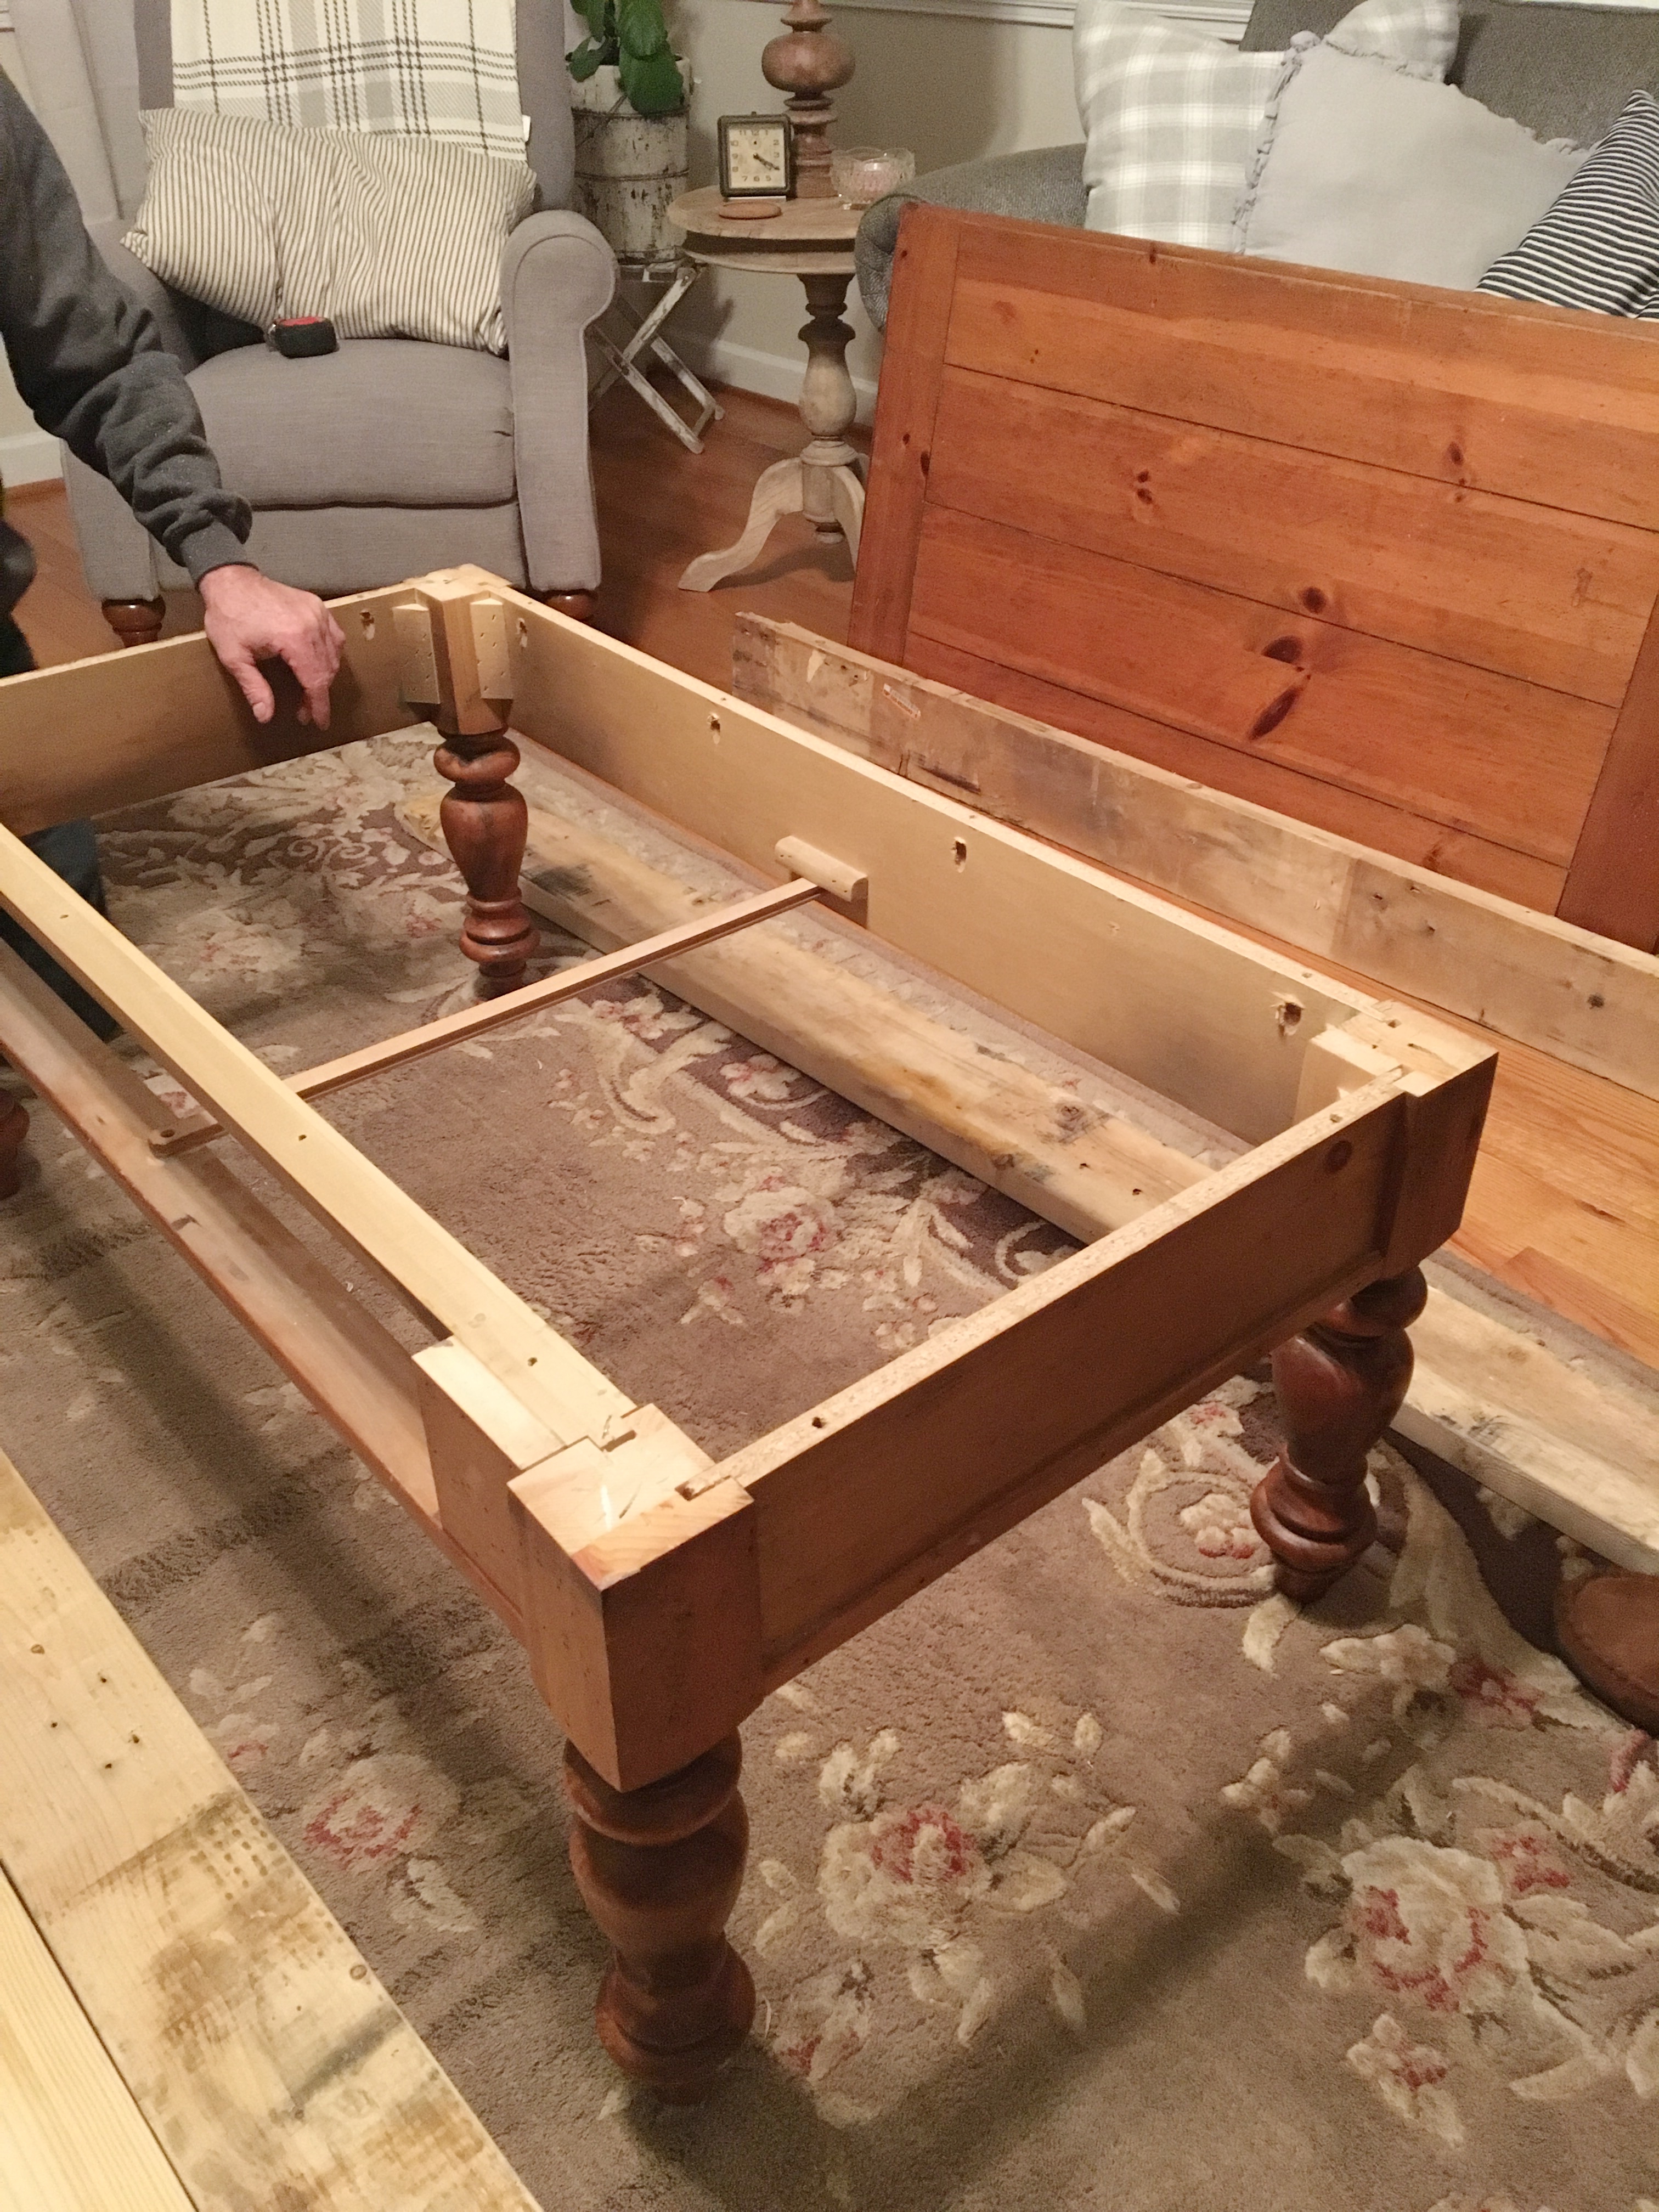
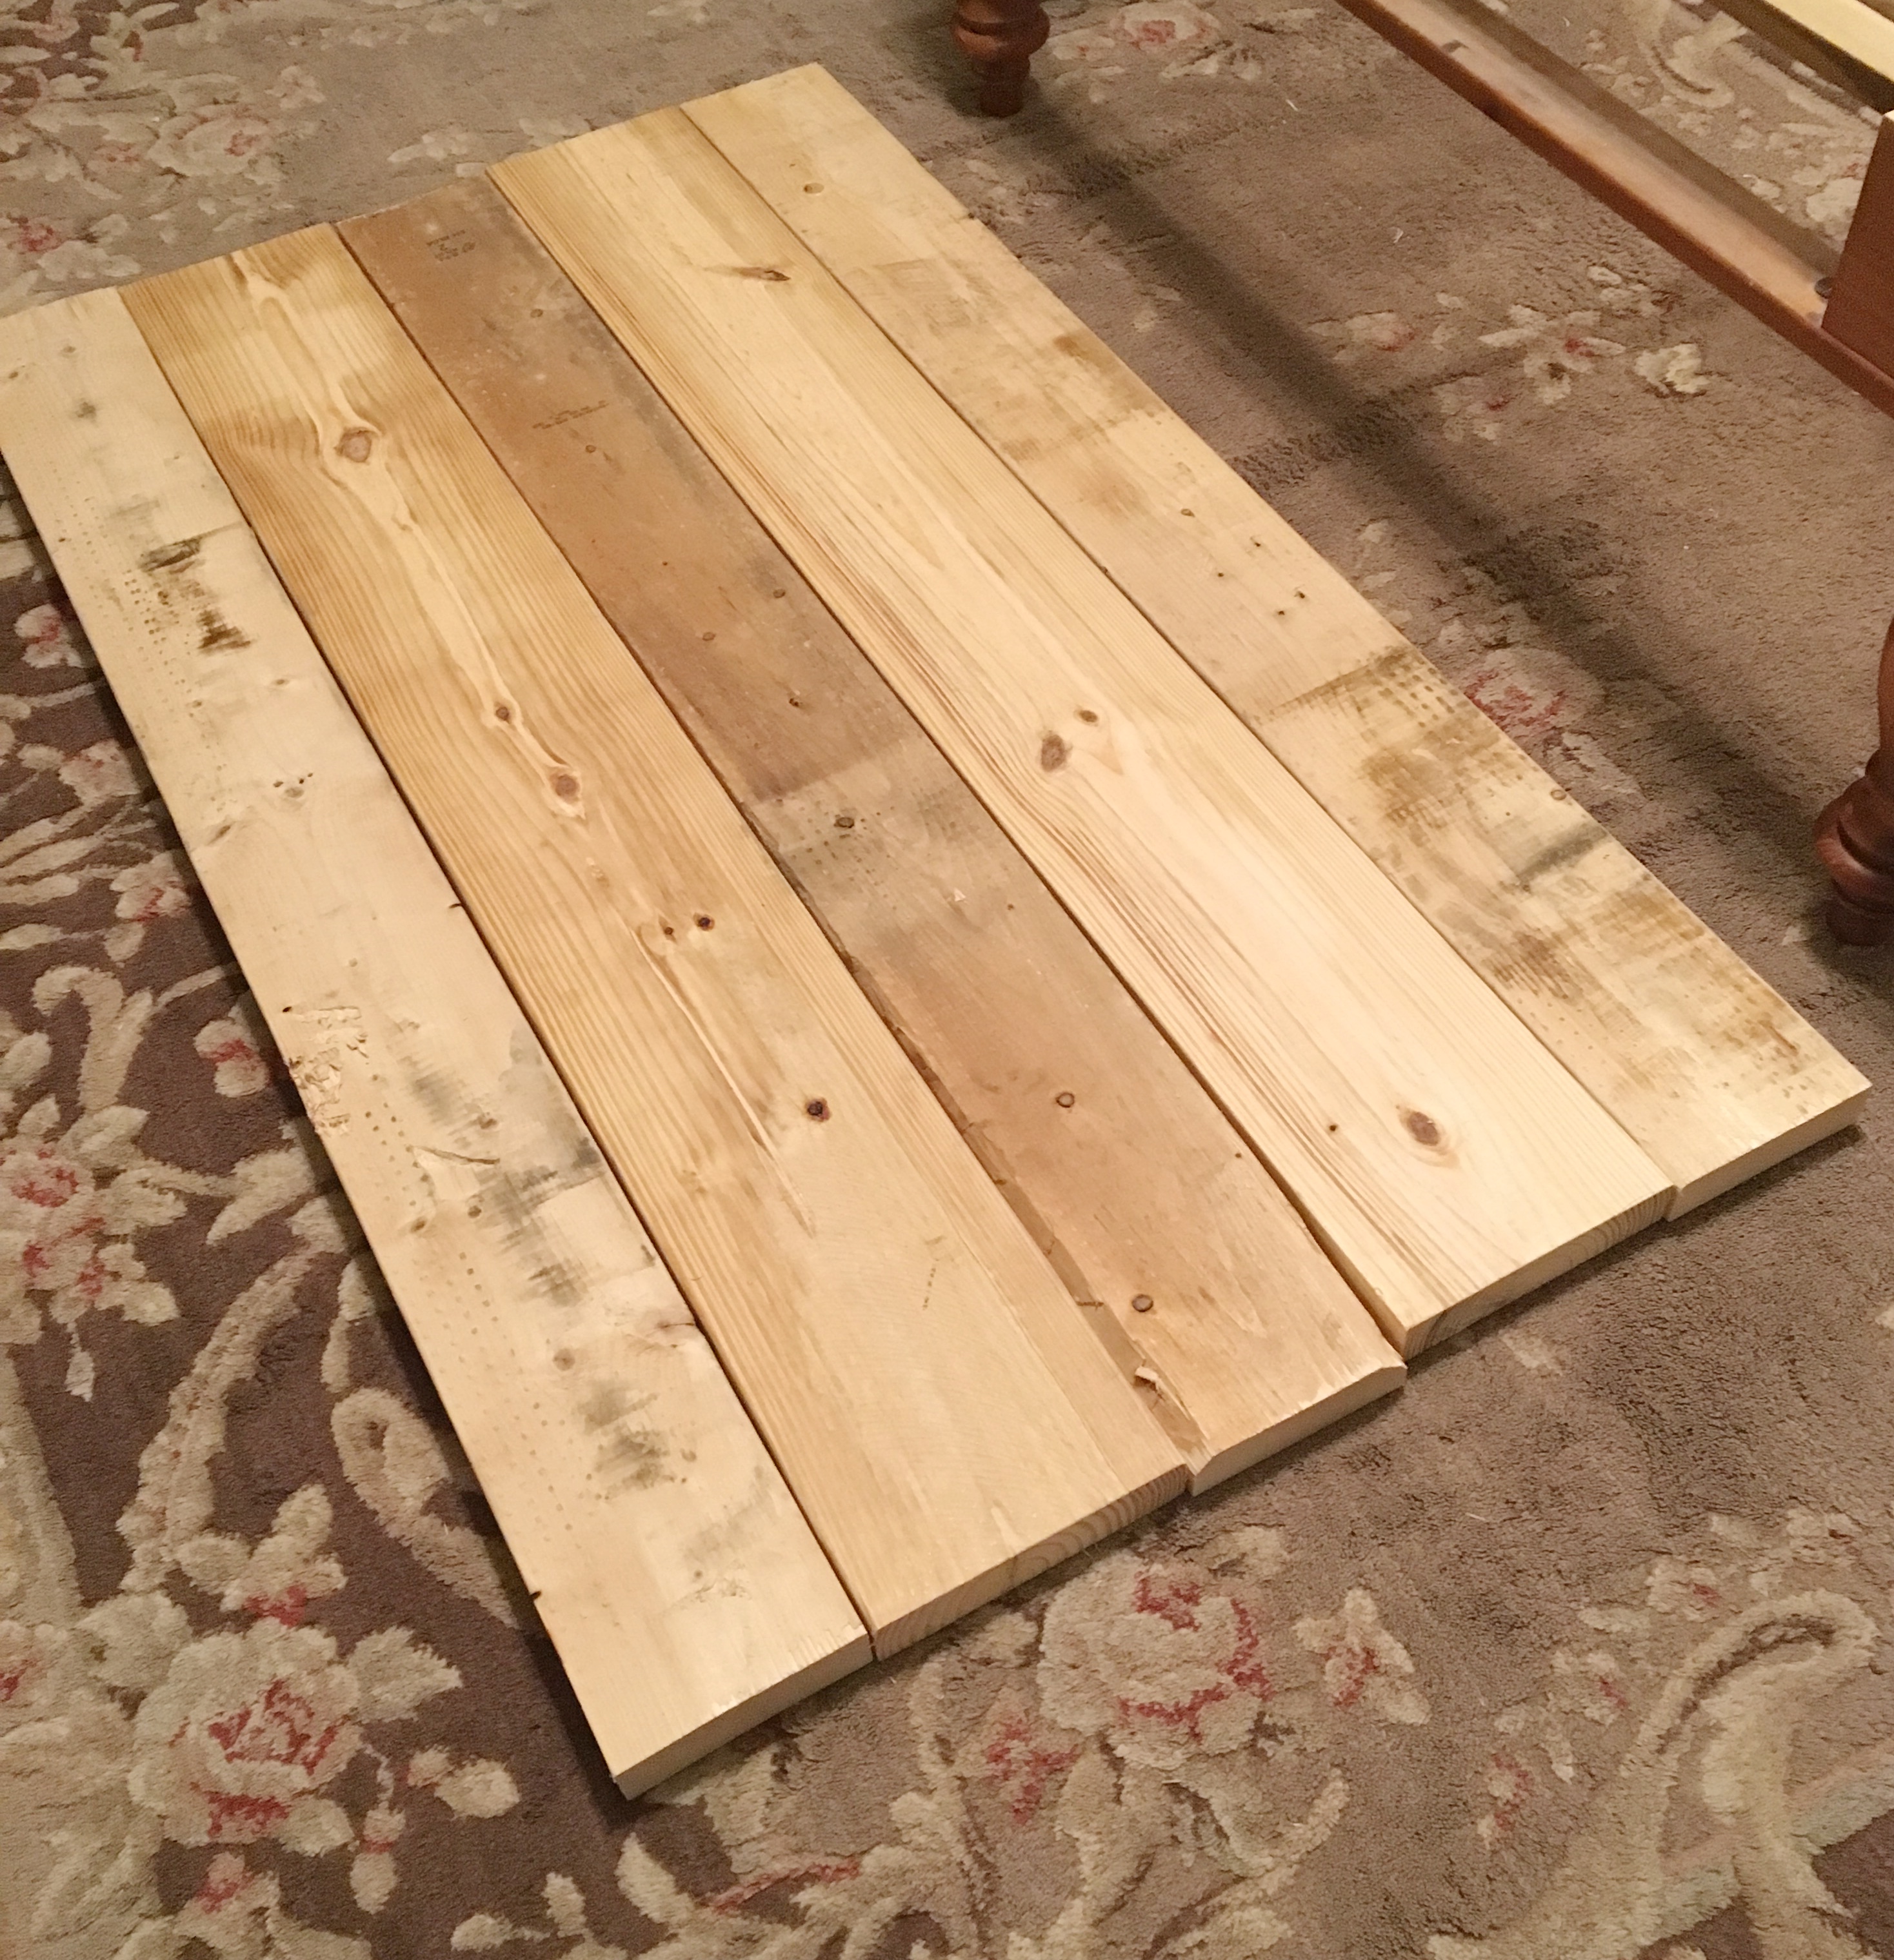
I envisioned a chunky table top to look like an old farmhouse table so first we had to remove the old top.
My number one son (my oldest) suggested that I used a tool of his called a pocket hole jig. You can find them at your local hardware stores. I’m pretty sure he bought his at Home Depot.

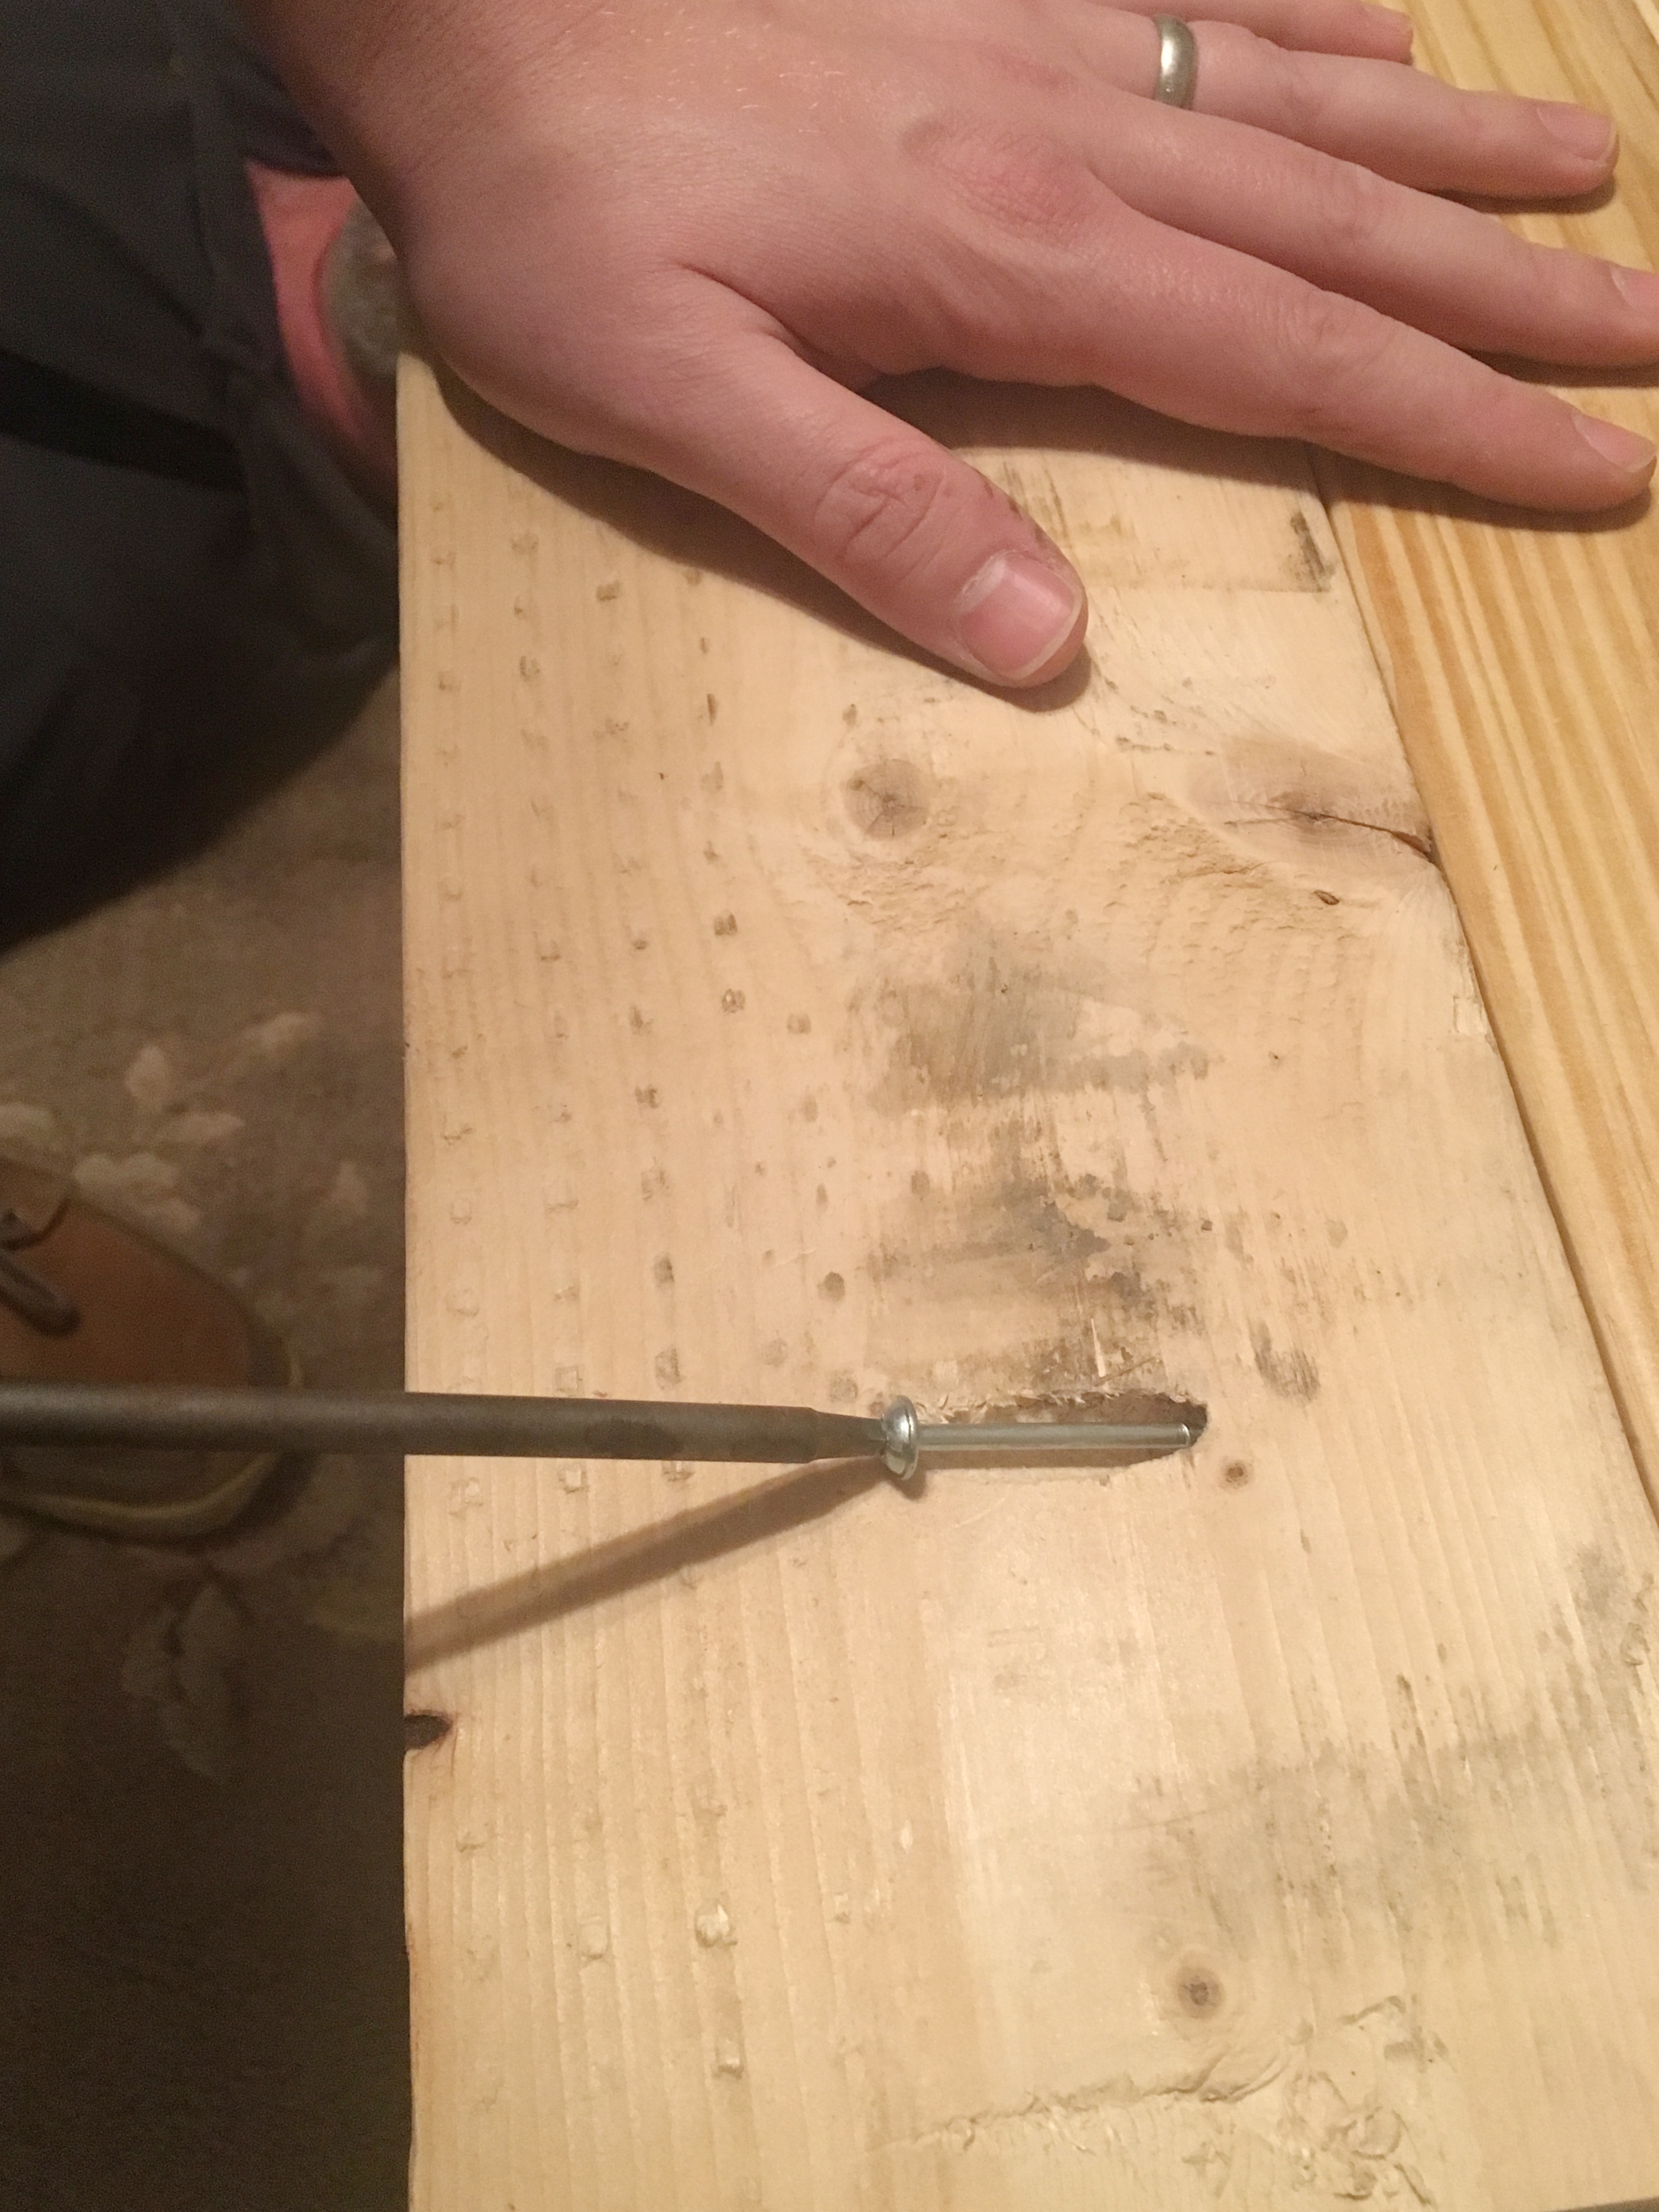
A pocket hole jig is a guide that allows you to drill holes into your boards at an angle so you can screw them together without seeing the hardware when you’re done. Lucky for me that I just happened to have a son that owns one. Even luckier for me that I have a son who was willing to come over to show me how to use it / do it for me. It’s the coolest thing!!!
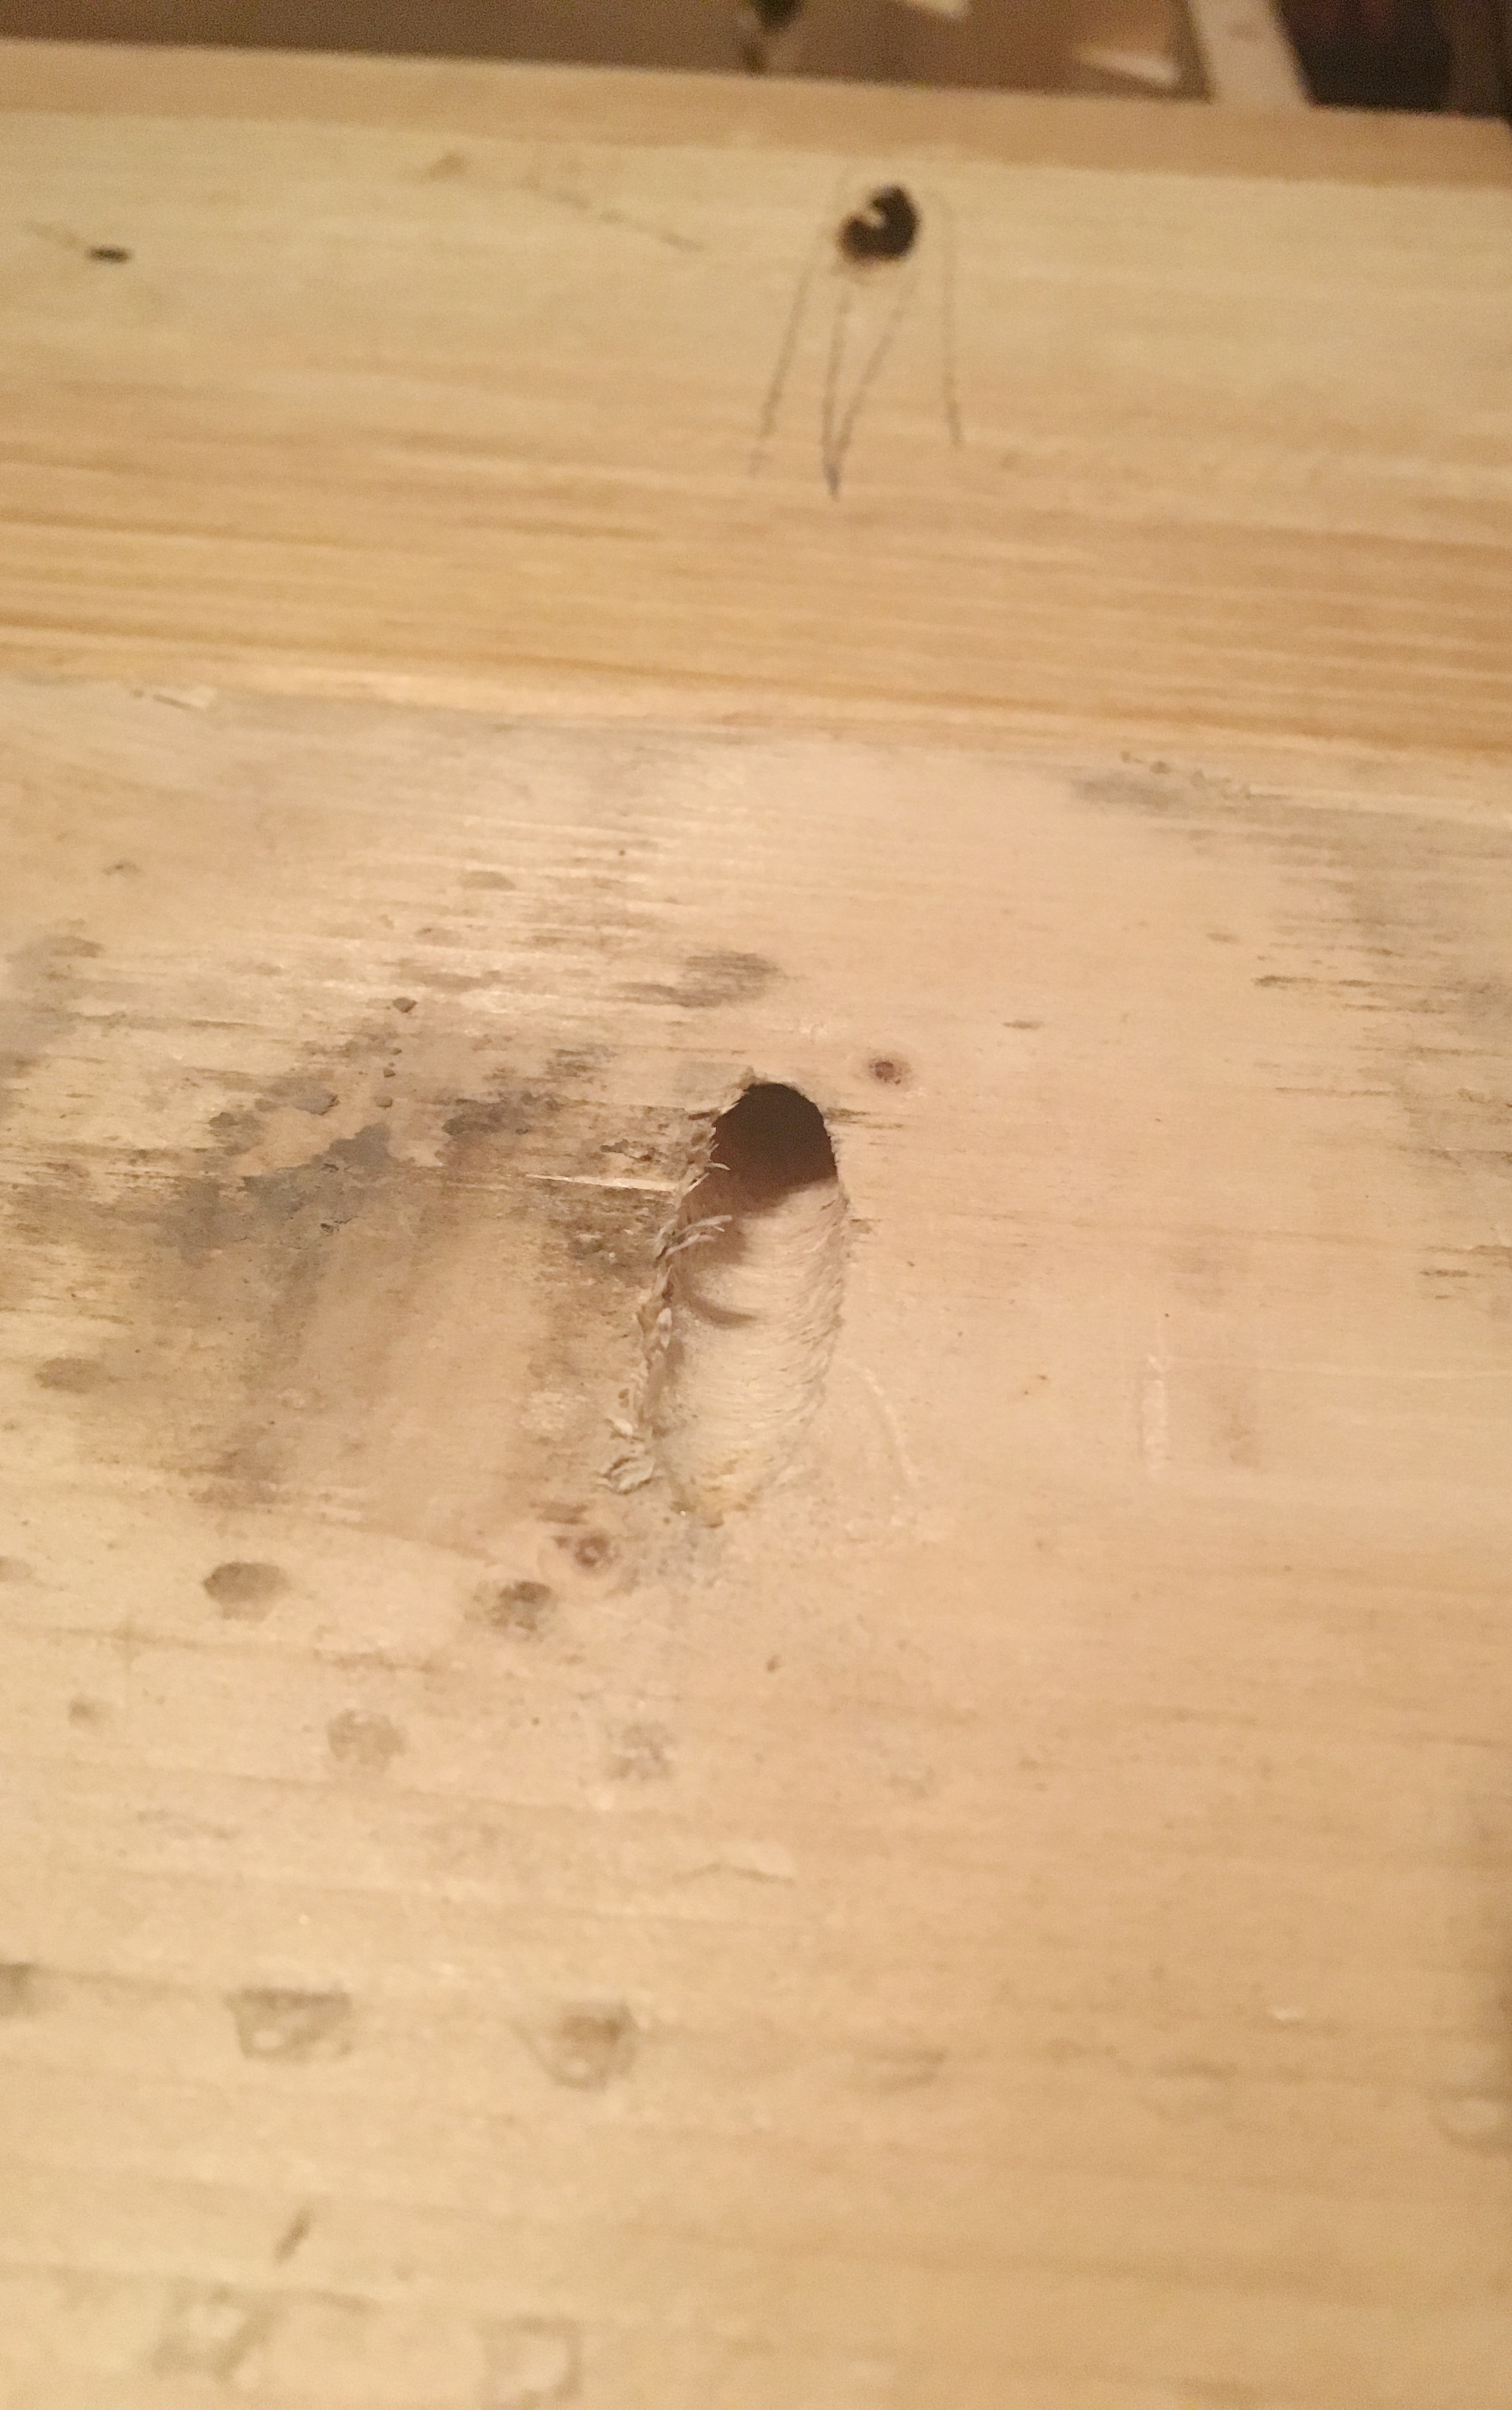
All the screws are hidden underneath and tucked into the little pockets.
We used a variety of 2X6 and 2X8 boards and cut them to the length that we wanted them.
I should also explain that when I say “we” I mean most of my family. This sort of turned into a little table building party. My mom and dad came over as well as my son and daughter in law.
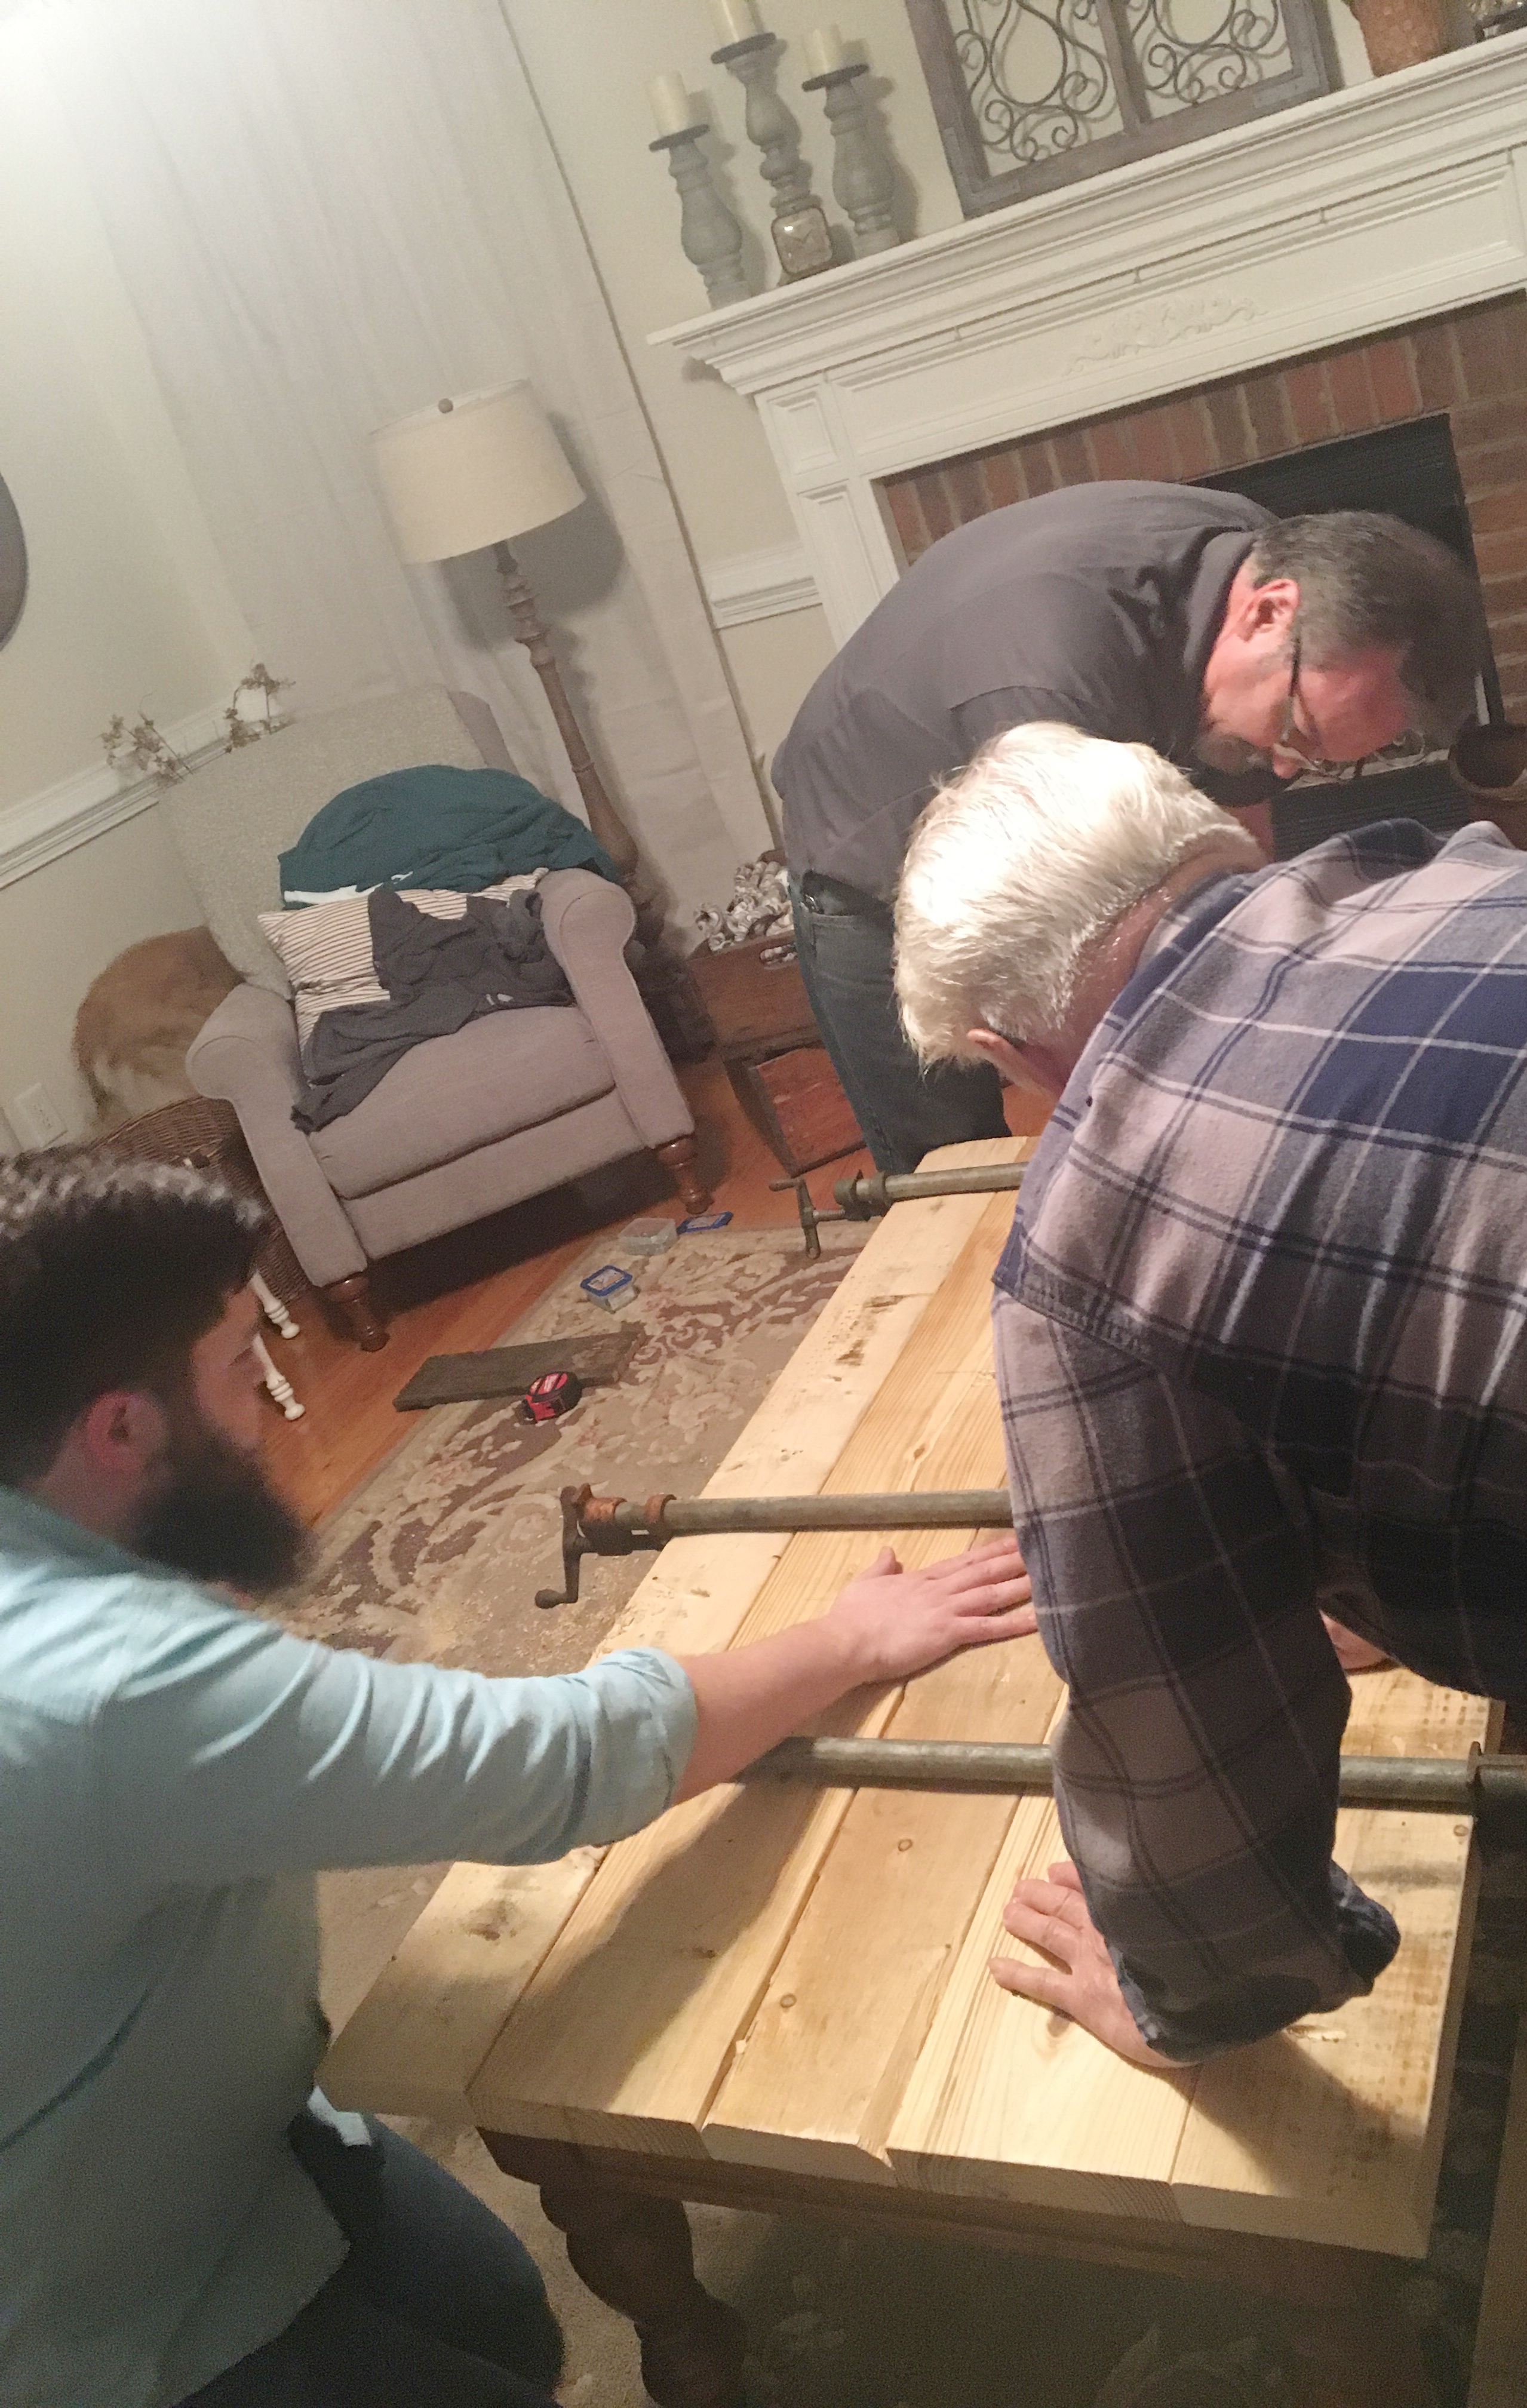
(Please excuse the mess in the room. When we’re building, there’s no time for tidiness…saw dust on the floor, pillows tossed about. If you look close enough at the picture, you can even see my grand puppy behind the chair. It’s a free for all, I tell you!)
I love nights like this. It was a lot of fun to watch everyone put in their two cents. We laid the boards upside down and attached them together using the pocket hole jig.
Once the top of the table was put together, we attached the base of the table using the same method.
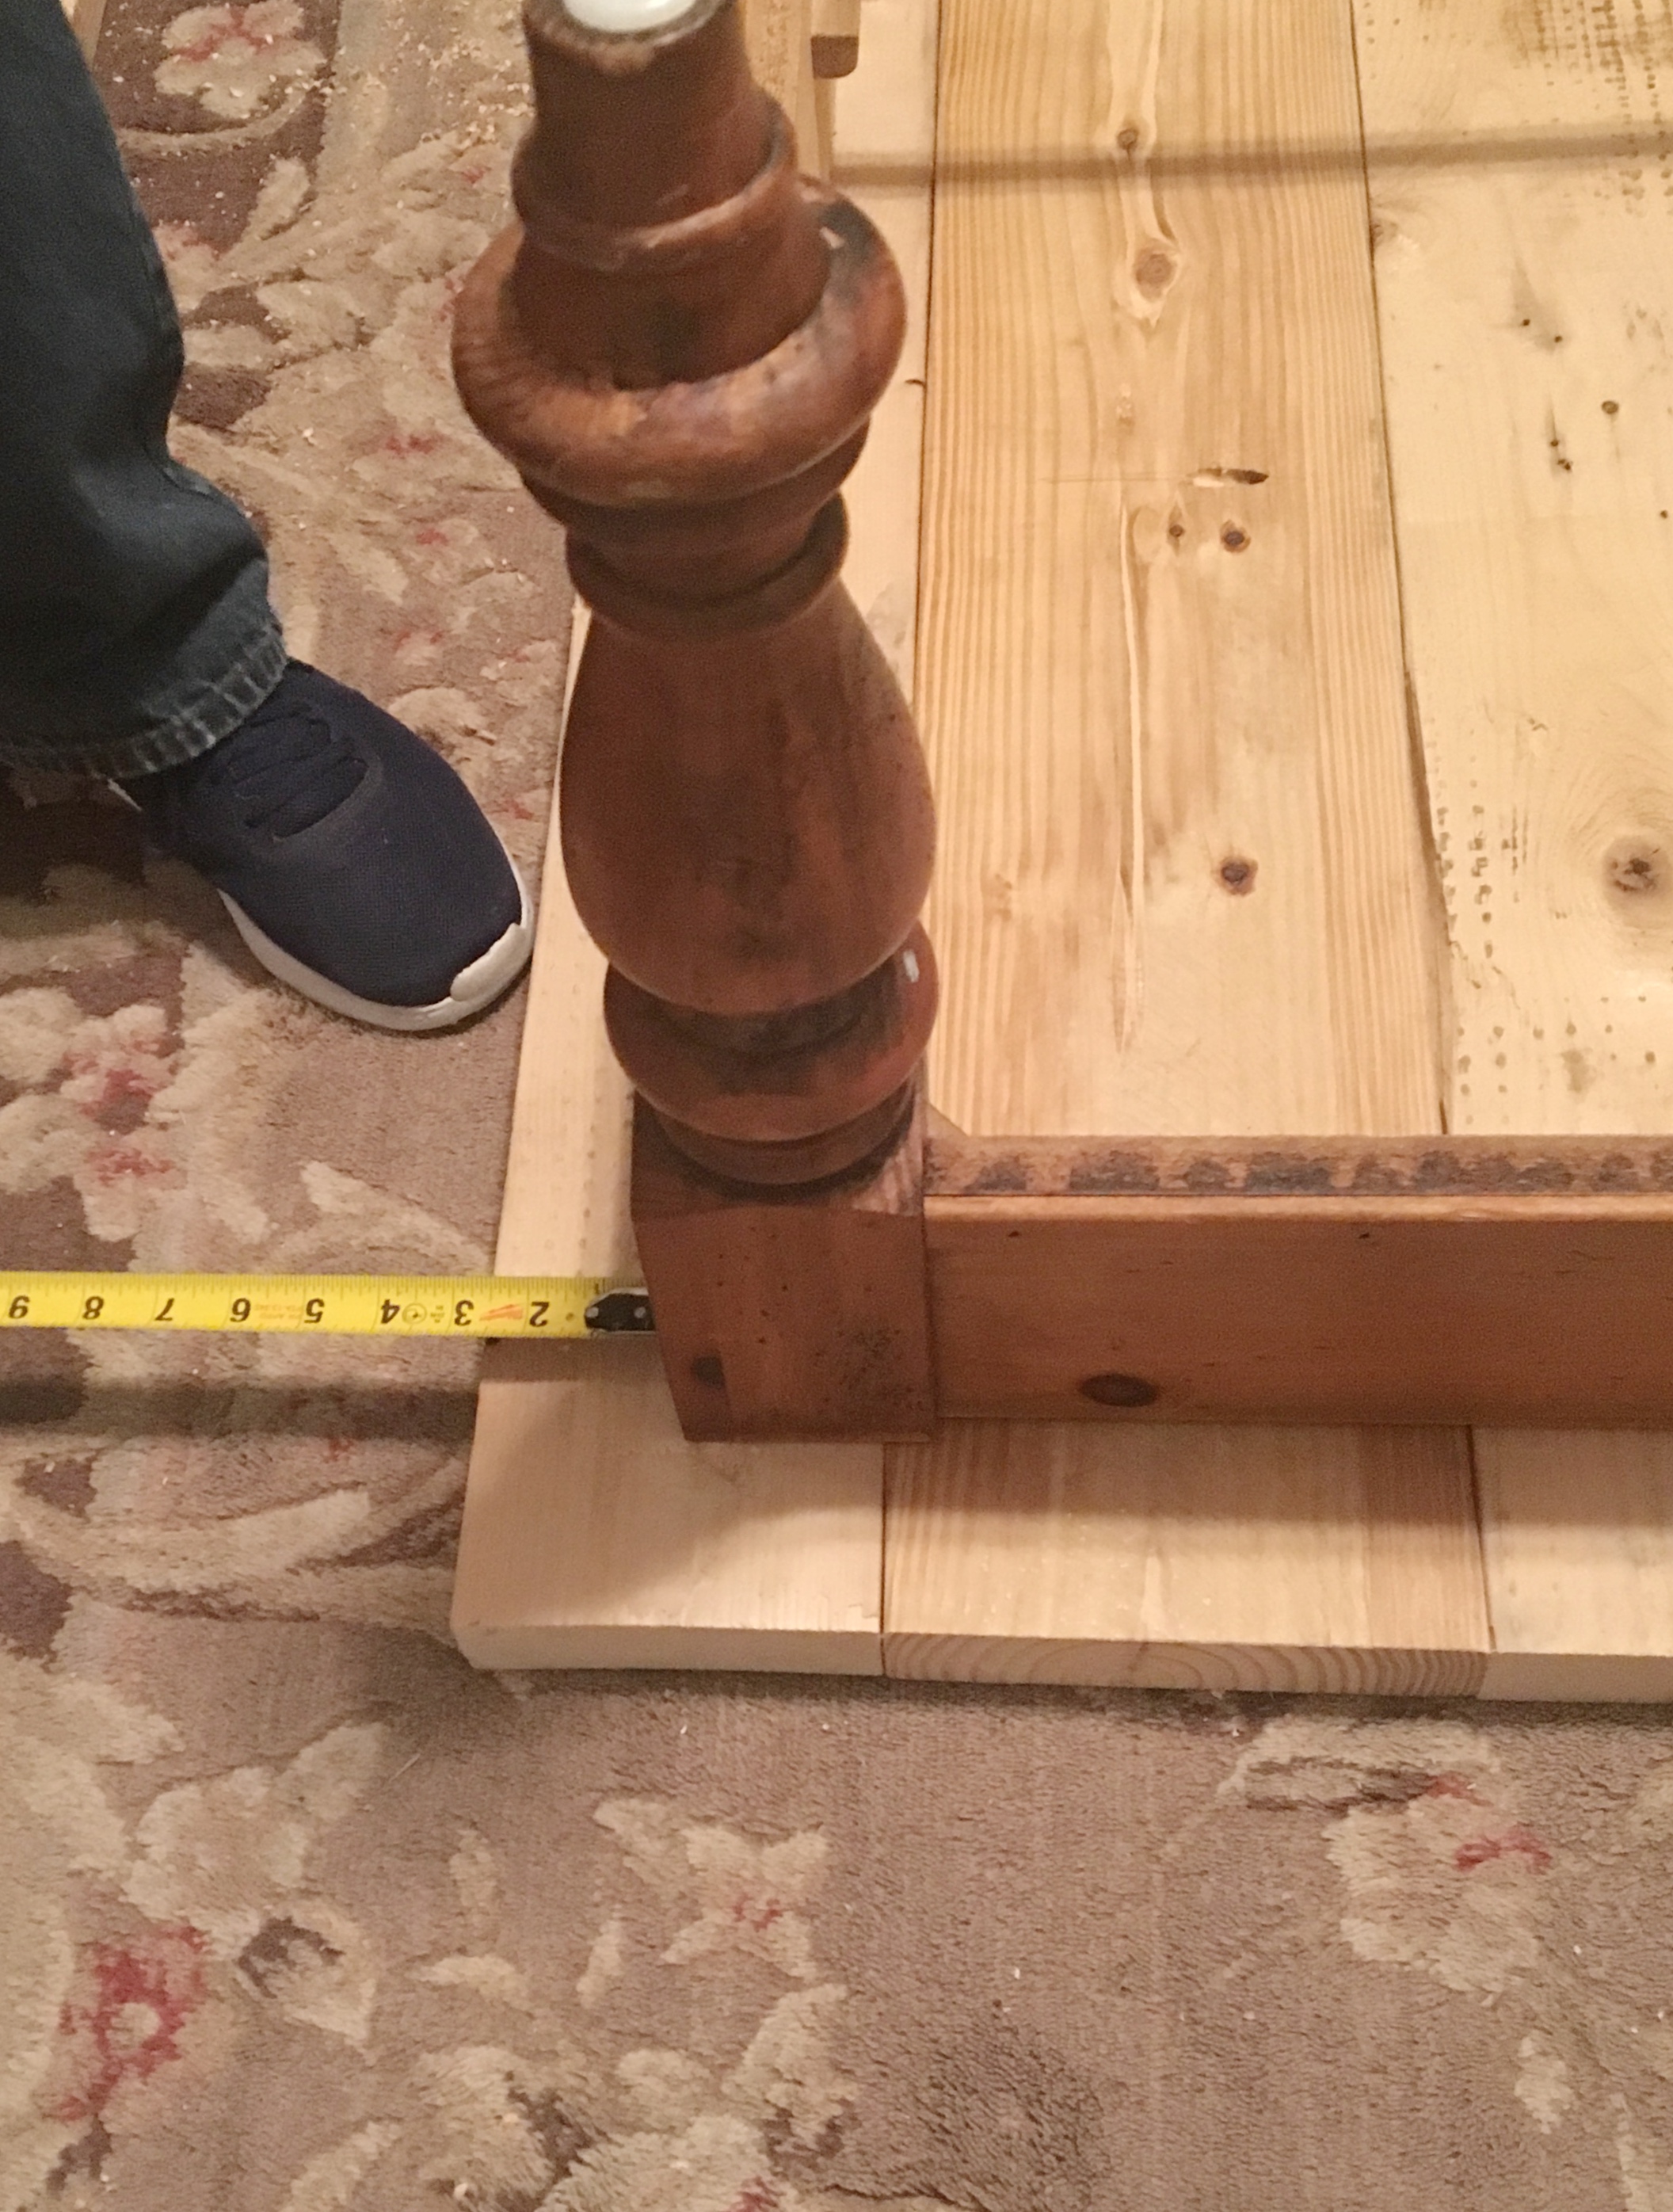
This is what the table looked like before the finishing touches.
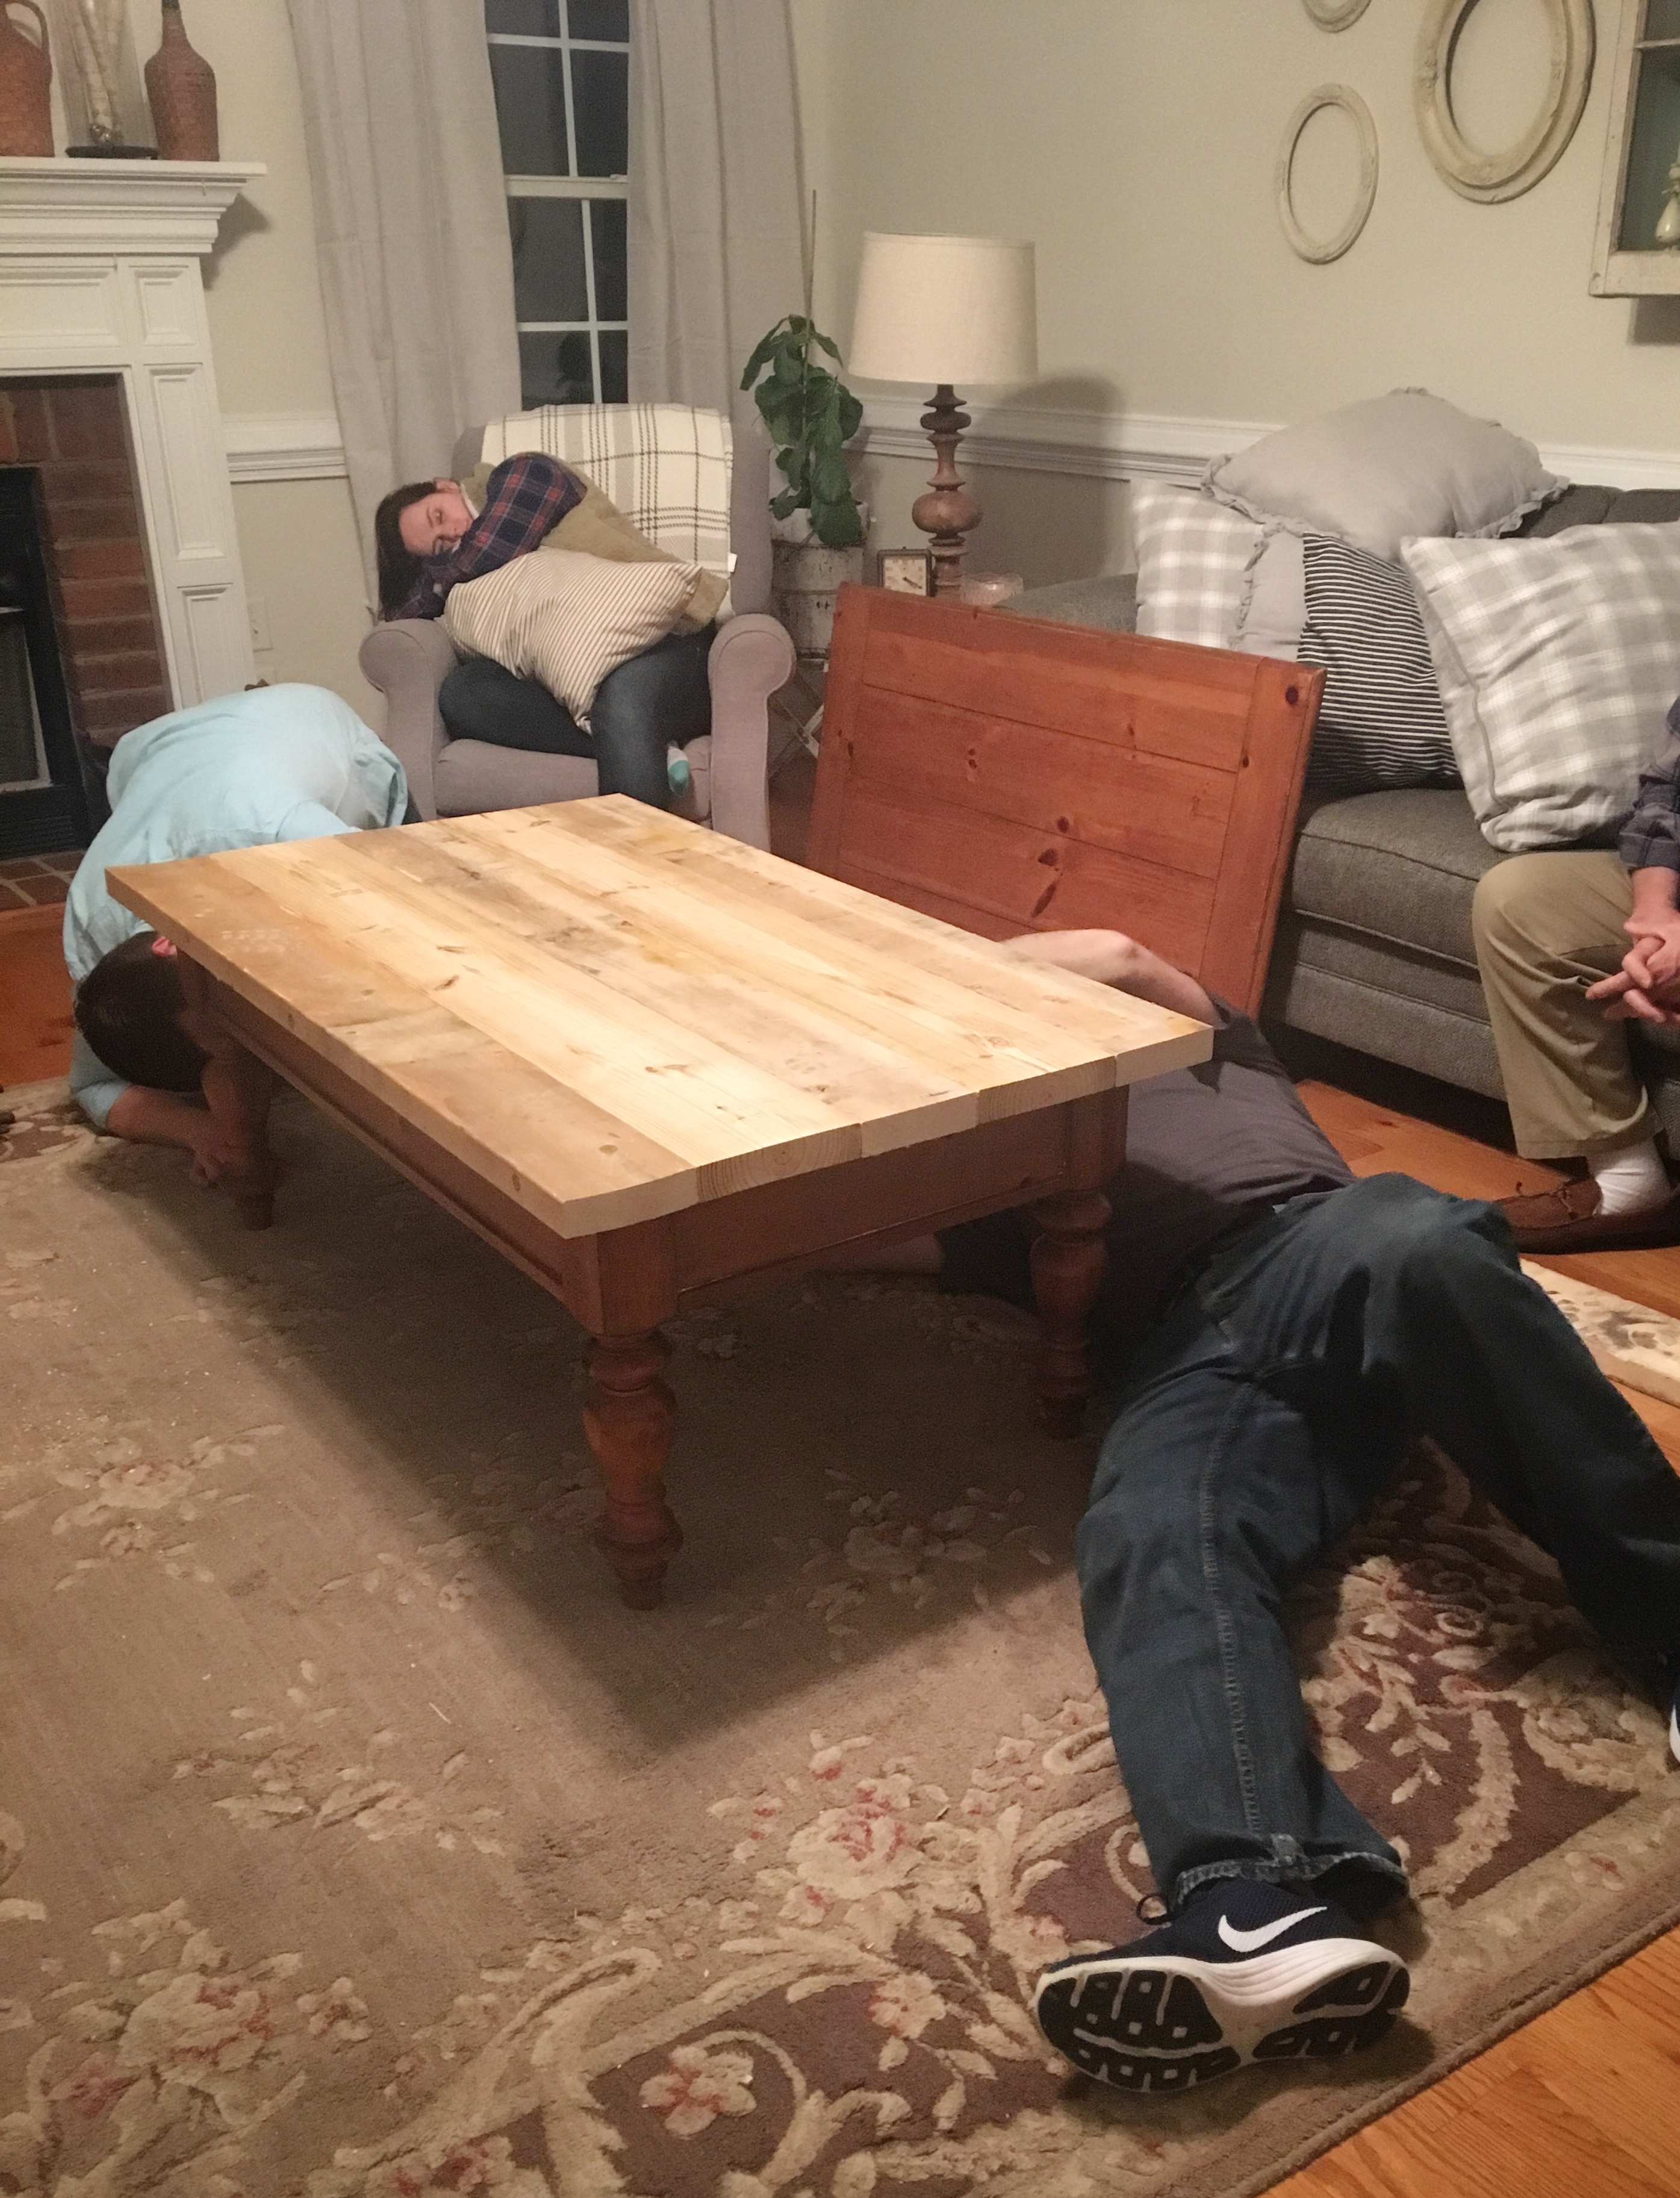
That’s my daughter in law asleep in the chair. She couldn’t take it anymore! haha. She’s a great sport for putting up with our family shenanigans. I love her to pieces!
Stop by next week to see the big reveal. I used a new paint method that I’ve never used before. I’ll let you know how I liked it.
Thanks for stopping by friends! You have no idea how much it means to me! Leave me a comment letting me know what you think so far!
![]()